An Introduction to Lighting in Quorum
This tutorial will cover ambient, directional and point light in Quorum.
To help with this tutorial, download this Lighting Tutorial zip file that contains a 3D scene to practice lighting. In our Drawing in 3D tutorial, we discussed basic lighting, but this tutorial will help us learn to do much more with lights.Code Area
Output Area
Quorum supports three types of lighting: ambient light, directional light, and point lights. The Quorum project we have downloaded has a scene built for us to explore lighting techniques. It is a hallway with some objects (a table, a flower vase, a mirror, a rug, and a portrait) in it. Let’s run the program before we make changes. Below is an image of the game screen our program produces:
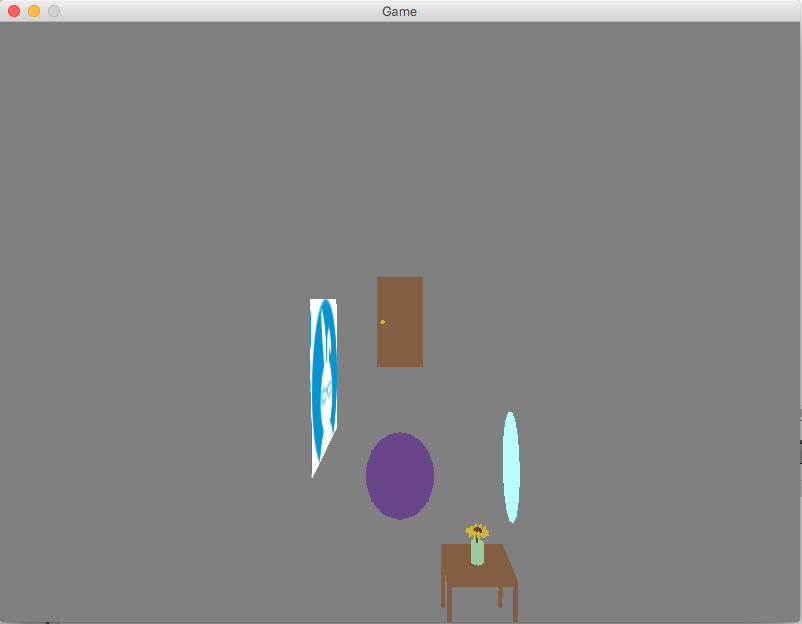
Right now, our project has no lighting set up. We will begin lighting our scene using the most basic form of light: ambient light.
Ambient Light
Ambient light is the amount of light present in a game. It has no source and no real direction. This type of light will illuminate each part of our game equally. The most important property an ambient light has is its color: the higher the RGBA value, the brighter the light. Because ambient light is distributed equally, it does not show depth and can make a game seem flat. To solve this, we will usually use a combination of ambient light and one or more other types of light in a game. Generally, an RGBA value of (0.4, 0.4, 0.4, 1) will be a good color for ambient light. We can always adjust this color based on how we want our game to look. For this particular scene, since we are layering multiple types of light, we will actually decrease the amount of light in our game by giving our ambient light an RBGA value of (0.3, 0.3, 0.3, 1). There can be only one ambient light, which is why we call SetAmbientLight, instead of adding it to the game.
Let’s begin lighting our hallway. At the top of our code, we need to add this use statement:
use Libraries.Game.Graphics.AmbientLightWe need to do three things in the CreateGame action to set up our ambient light:
- instantiate an AmbientLight object
- use that object’s SetColor action to set the color of our light
- call the action SetAmbientLight (which we have available since we inherited from Game) and pass our light to it as the only parameter
Now, this is what our CreateGame action should look like:
action CreateGame
        camera = GetCamera3D()
        camera:SetPosition(0, 25, -500)
        camera:LookAt(0, 0, 0)

        createHallway()

        AmbientLight ambient
        ambient:SetColor(0.3, 0.3, 0.3, 1)
        SetAmbientLight(ambient)
    end
Now, let’s run our program (F6). Below is an image of the resulting change in the game screen:
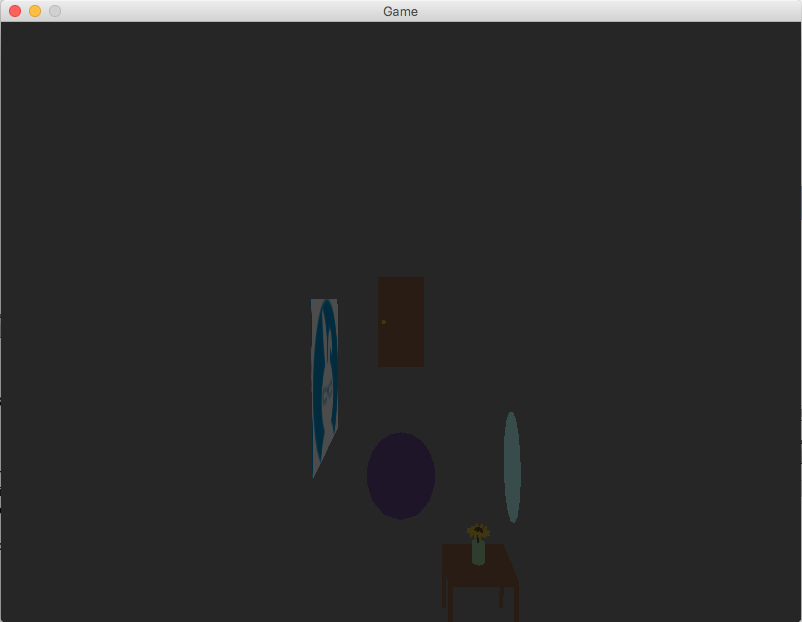
The light in our game scene has been dramatically lowered. In fact, this change has made our scene even less visible. However, as we layer more light in our hallway, it will become clearer. The next type of light we will use is called directional light.
Directional Light
Directional light is similar to ambient light because it does not have a specific source point. Unlike ambient light however, directional light does have a direction. We can think of directional light like sunlight in our game. Because it has a direction, directional light will show more depth and detail than ambient light and make our game look less flat. In fact, once we add directional light, we will be able to distinguish the walls and floor of our hallway.
Adding a directional light is similar to setting the ambient light, with one important addition: we need to give our light a direction. We set this direction using a point in 3-space (x, y, z). Our light will shine in the same direction as a line drawn from the point (0, 0, 0) to the point we give. Because our game is a long hallway, in order to give it depth, we can make our directional light shine just off-center and toward the door at the end.
Before we start writing the code for our directional light, we need to be sure that Quorum knows where to find that class, so we add the use statement for a DirectionalLight object:
use Libraries.Game.Graphics.DirectionalLightat the top of our program with the other use statements.
Once again, we will be writing this code in the CreateGame action. If we want, we can take some time to play around with the color and direction settings of our light, but the values given below mix with the other lights in our game to create a great final product. This is what the code for that action will look like now:
    action CreateGame
        camera = GetCamera3D()
        camera:SetPosition(0, 25, -500)
        camera:LookAt(0, 0, 0)

        createHallway()

        DirectionalLight light
        light:SetColor(0.86, 1, 0.97, 1)
        light:SetDirection(0.1, -1, 1)
        Add(light)

        AmbientLight ambient
        ambient:SetColor(0.3, 0.3, 0.3, 1)
        SetAmbientLight(ambient)
    end
Now, let’s run our program once again. The image below shows the result of adding a directional light:
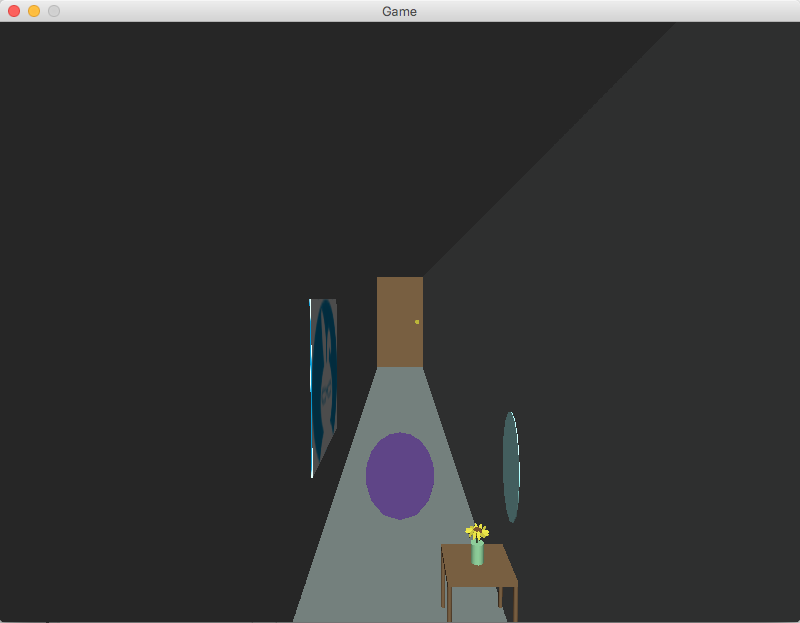
Now, the details of our hallway and the objects in it are much clearer. The hall is still dark, so we need to add our final type of light: a point light.
Point Lights
So far in these tutorials, we have not encountered a point light. This type of light is different from both directional and ambient light because it has a point of origin. We can think of a point light like a lightbulb. It has a specific source point, but the light goes out from that point in all directions. Like directional and ambient lighting, we need to set a color value, but a point light needs two additional values:
- a position
- an intensity
Position just tells Quorum where we want our point light, but intensity is a new concept. This number represents the radius of a sphere around our point light. The edge of that sphere is as far as the light will go. However, the light diffuses, or becomes less intense, toward the outside of that sphere. So, let’s say we have two objects on our game screen: one at position (0, 0, 0) that we want to be lit and another at position (20, 0, 0) that we want to remain in the dark. If we put a point light at (0, 0, 0) and set the intensity to be 20, that means that none of the light from the point light will reach our second object. Keep in mind that the position point is at the center of an object, so if our second object was 6 units wide for example, we would want to subtract half that distance (3) from the distance to find out how far the edge was from our point. In this case, the edge of the second object is at 20-3=17 from our source.
Our hallway is very long, and we want our point light to be very intense, so our intensity will be very high.
In order to best see the effect of a point light, we will create an object to show us where the point light is, and we are going to make our point light move down our hallway. In order to do this, we will need to write code in a couple of places.
First, we need to add the use statement for the point light with the other use statements:
use Libraries.Game.Graphics.PointLightThe next place we will write code is at the very beginning of our Main class. Right now, there is just one line of code instantiating the camera. We need to add two lines of code there, an instantiation of our model class for the lightbulb, and an instantiation of the PointLight class:
    Model lightbulb
    PointLight hallLight
We also need to write code in our CreateGame action to:
- Load a model to represent our lightbulb
- Give our lightbulb an initial position
- Set our point light’s color, position, and intensity
- Add our point light to our lightbulb object so that they move together
- Add our lightbulb to the game
This is what our CreateGame action should look like now:
action CreateGame
    camera = GetCamera3D()
    camera:SetPosition(0, 25, -500)
    camera:LookAt(0, 0, 0)

    createHallway()

    DirectionalLight light
    light:SetColor(0.86, 1, 0.97, 1)
    light:SetDirection(0.1, -1, 1)
    Add(light)

    AmbientLight ambient
    ambient:SetColor(0.3, 0.3, 0.3, 1)
    SetAmbientLight(ambient)

    Color bulb
    bulb:SetColor(0.98, 0.98, 0.82, 1)
    lightbulb:LoadCylinder(10, 2, 10, bulb)
    lightbulb:SetPosition(0, 35, -500)
    hallLight:SetColor(bulb)
    hallLight:SetPosition(0, -3, 0)
    hallLight:SetIntensity(7500)
    lightbulb:Add(hallLight)
    Add(lightbulb)
end
Now, if we run our program (F6) right now, we can see that our point light is so intense, it washes out a lot of our scene. But since we want to see how the light changes as it moves down the hall, let’s keep the intensity very high. Below is an image of our game screen with the still point light:
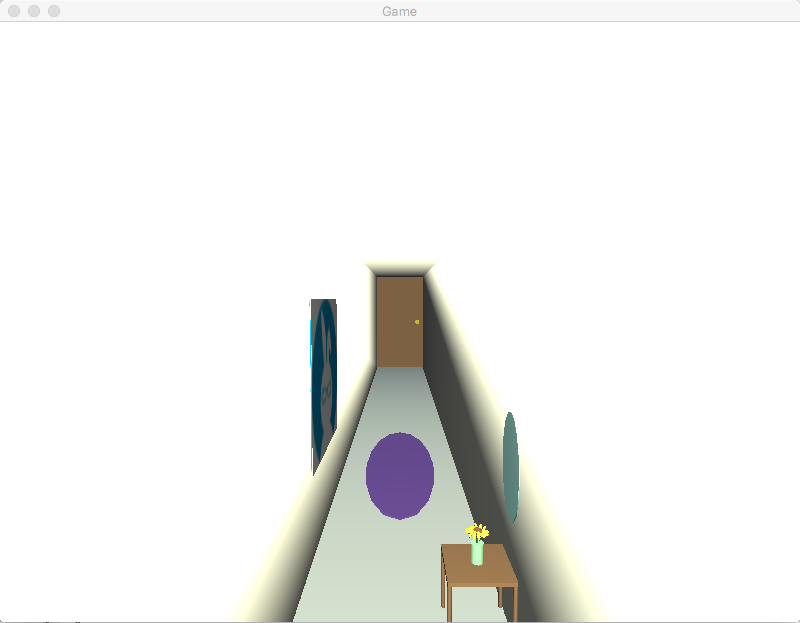
The final place we need to write code in order to make our point light move is in the Update action. Let’s navigate to the Update action. Here we will make our light move along the z-axis by 0.75 every frame. In order to stop the light when it exits the hallway, we will write an if statement that checks the z-position of our light bulb. In order to do this, we will use a Vector3 in our Update action like this:
action Update(number seconds)
    Vector3 point = lightbulb:GetGlobalPosition()
    if point:GetZ() < 50
        lightbulb:Move(0, 0, 0.75)
    end
end
Now, if we run our program (F6), we will see our point light move down the hall.
In this tutorial, we have learned how to affect a game using the three types of light in Quorum: ambient, directional and point light.
Next Tutorial
In the next tutorial, we will discuss Gravity In 2D, which describes how to add gravity to a 2D game.