Tutorial: Coding in Teams
How to start using Git to code in teams.How to store various kinds of items in memory.Introduction To Git/Version Control
Often when working on programming projects, we work in teams and we want to have access to older versions. Perhaps the most common way to meet both goals in industry is to use a type of program called "version control." In this tutorial, we will discuss one way of collaborating on teams with version control using a system called Git.
What is Git?
One of the most common methods of collaborating and tracking work is through a version control system, like Git. Git's purpose is to make continuous backups of code, to provide access to those backups and to coordinate changes made by different people so that everybody stays synchronized. The general idea is to make it more difficult to lose work that is being completed on a project and to be able to quickly revert to previous versions. Given that real-world projects are almost always completed on a team, Git allows collaboration among many programmers on a single project. The system works by having a common repository stored on a networked server which keeps a master copy of the source code and project files. Team members can "pull" a copy to their local environment, which means they download a copy of the code from the web to work on. Once developers obtain the source code, they can make changes and send them back (through a process called committing and pushing). Doing this by hand, by emailing files back and forth for example, would be complicated and prone to error. Git handles all of this for us automatically.
Getting Started
Git is supported in Quorum Studio 2.0 and above. To start using Git, we need to download a copy of the code "repository." A repository is a set of files online that we can pull (download) from and push (upload) to. Several websites are available to store shared code repositories, including two of the more common ones: Github and Bitbucket.
Bitbucket
Bitbucket is one of the most popular websites used to host Git repositories. Bitbucket allows users to have unlimited public and private repositories for teams of up to five people. To sign up with Bitbucket, navigate to the Bitbucket website and use the the Get Started link at the top of the page. Once there, we will need to enter our information to make an account.
Github
Github is another popular option for hosting Git repositories. To sign up with Github, we can navigate to the Github website and select the Sign Up link at the top of the page. Again, we enter our information to create the account. Both websites are supported within Quorum Studio.
Starting a Repository
Before we can start using Git to manage our project, we need to set up a location on our Bitbucket or Github account for our code to go. To do this, we need to create a repository on our Bitbucket or Github account for our project.
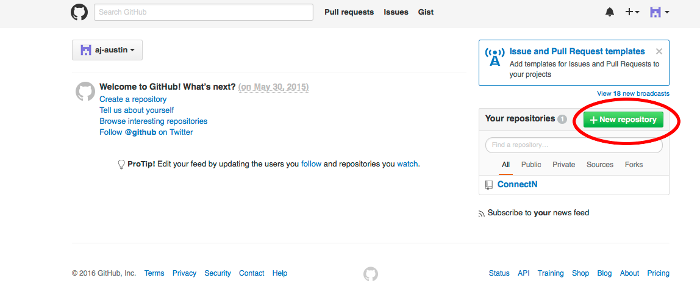
If we are using Github, look for the link that says "+ New repository." This link is located above the list of any already-existing repositories we may have.
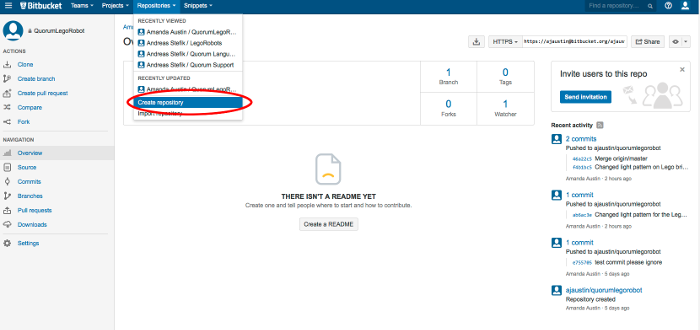
If we are using Bitbucket, the link to create a new repository is under the Repositories navigation bar. Select "Create Repository" and then follow the instructions to create the repository. (The keyboard shortcut to create a new respository is: "c" and then "r")
Follow the instructions and fill in the necessary information in order to set up the new repository. Typically, it will ask for a repository name and whether the repository is public or private. A private repository is a repository that can only be seen by people that you specifically give access to. A public repository is a repository that can be viewed by anyone.
Cloning a Repository
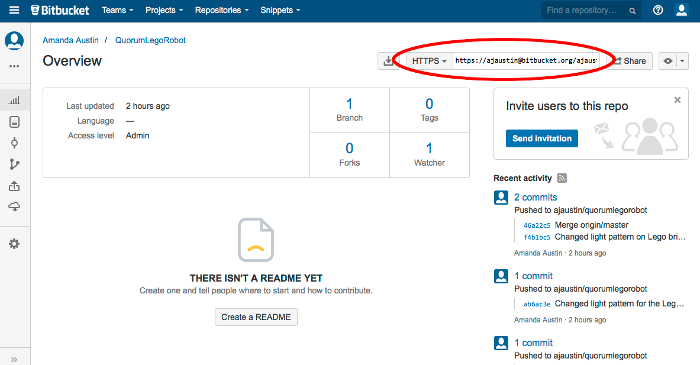
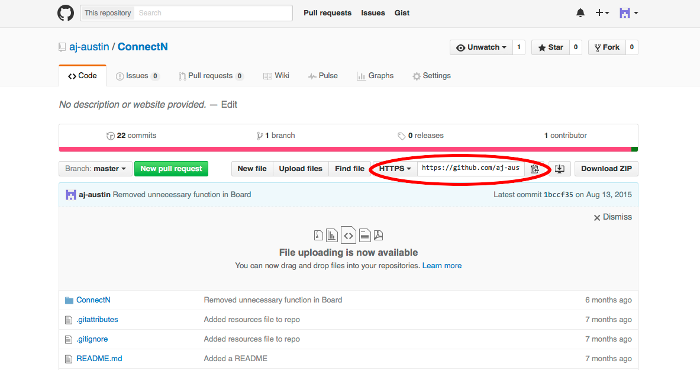
Once we have a repository created on Bitbucket or Github, we need to get a copy of it on our local machine by "cloning." Cloning a repository downloads all of the files from that repository, typically from the Internet. To clone a repository, we first locate it (or one from another person) and then we look for its address. Just like websites, git repositories have their own address. In Bitbucket, this link is located at the top of the page of the repository towards the right. In Github, it is also located near the top of the page towards the right. Here's an example of a repository:
https://bitbucket.org/stefika/quorum-language.gitThe above is the Git repository for Quorum itself.
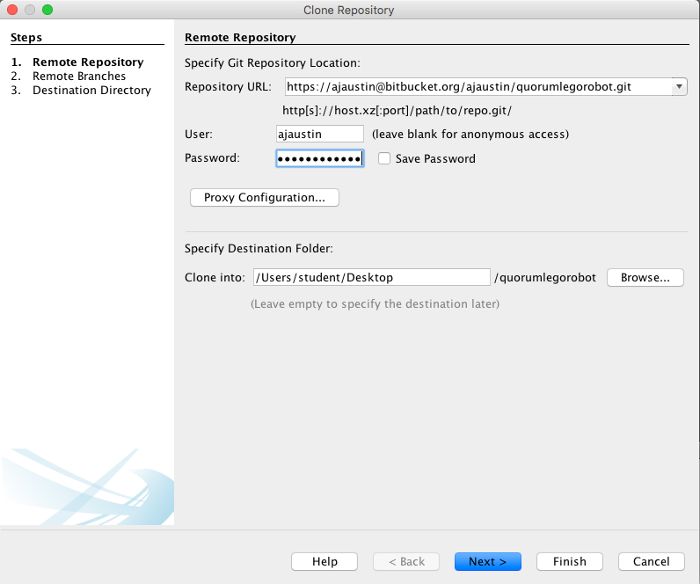
First, copy the link to clone the repository from the browser and then switch to Quorum Studio, go to the Team tab in the Menu bar and select Clone.

In the pop up window, add the link you copied from the repository in the box for Repository URL, the username and password for your Github or Bitbucket account and the location to save the repository. When complete, select next.
Once the project is cloned, you will need to open the project.
Adding/Removing Files
When we create new files, Git needs to be told to track these new files in the repository. We can use the Add menu item under teams to add files from the project. We can also select Add Project Files, which adds all changed source files.
Committing
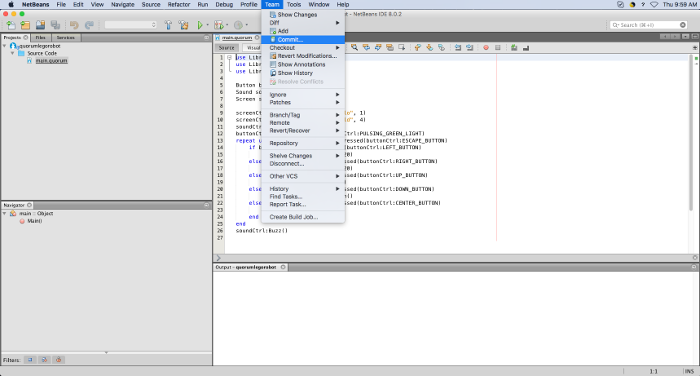
After we have finished modifying a file, we are ready to send our changes back to the server. This involves a two-step process: 1) committing, and 2) pushing. Committing tells Git that we want to store a new version locally, meaning on our machine. We can think of a commit like a "snapshot" of our project at a particular time (e.g., version 1, version 2, version 3). To commit changes to a project, we open the Team tab in the navigation bar, then select Commit.
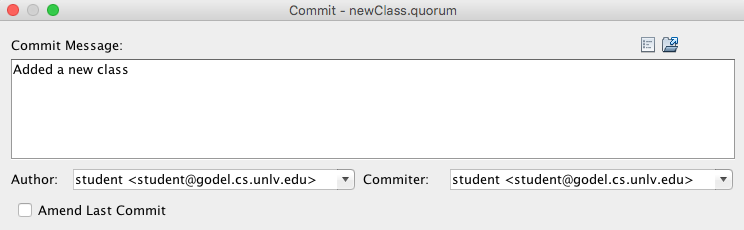
A pop up window will ask us to add a commit message. A commit message is something we write to remind people what was changed. Keep in mind that messages written are public, meaning anyone on the project (e.g., our teacher, our friends, the world) can see them. As such, we should keep commit messages respectful.
Pushing
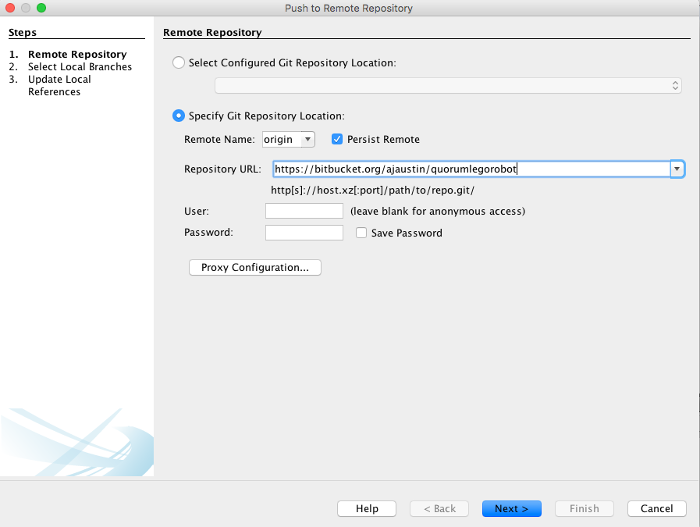
Typically, after committing changes to a project, we want to send the source code back to the server. We call this a "push." A push is an action that takes the files of our project from our local computer and uploads them to the repository, usually one located on the Internet. In our case, this other repository is on the server at Bitbucket or Github. Once the repository is pushed our files are backed up and protected if something were to happen our computer. As an additional benefit, by regularly committing and pushing our files back to a server, others on a software development team can obtain our updates by doing a pull.
To push, we first need to set our username and password. We do this by opening the project properties for the project we are pushing to and going to the Teams tab. We then enter our username, password, and optionally our name and email, into the text fields. We then press OK and select Push from the Team menu. Once complete, information is output in the console.
We have now completed our first push! Our team members can now get access to the code we've been writing by cloning if they are just setting their project up for the first time. If they already have the project repository cloned on their local machine, they can update with our changes by "pulling" the current version of the repository, which we will talk about next.
Pulling
Similar to how pushing is the way to upload our changes to the repository, pulling downloads the latest updates from an existing repository to our local machine. Typically, when other team members are writing code and pushing it, we want to stay up to date, so we pull down the changes, integrate them into our local project, and then push back our own changes.
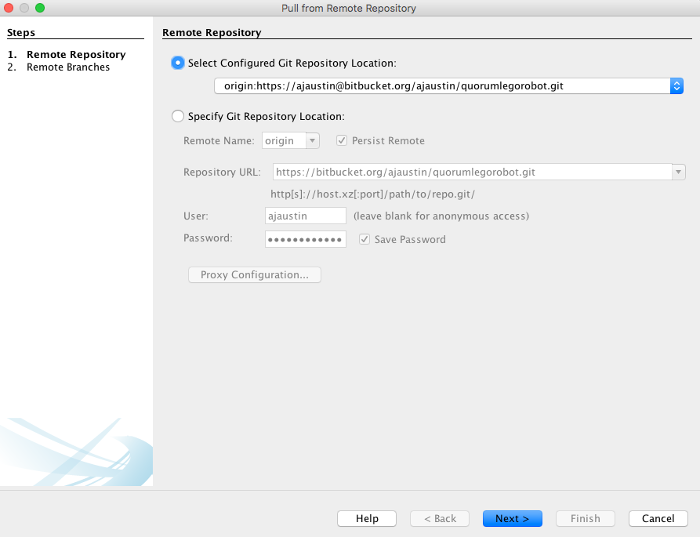
To pull a project, under the Team menu select Pull. Information about the request will be sent to the console.
With pushing and pulling, it is often customary to pull from a repository when we start working on the project for the day. When we make any important changes that we want to keep, we commit those changes. When we are done working on a project for the day, we push all of our changes to the remote repository. This is not required, but it's a reasonable and typical way to control source code on a project.
Merging and Merge Conflicts
Occasionally when working with Git, we encounter Merging and Merge Conflicts. These can be confusing and are caused by multiple team members changing the same files in the repository. They can be avoided by team members being aware of what parts of the code they are working on in comparison to their colleagues, to prevent overlap. They can still come up though, so we need to know how to resolve them.
When we push or pull from a repository, Git tries to reconcile all the differences between the code in the two locations, that is, the code on our computer and the code on the remote one. Most of the time, it is able to tell where differences are and how to put the two versions of the file(s) together. Sometimes, however, two or more versions have made changes to the same line, and Git cannot know which line is intended, so it can not properly merge the files. This is where a conflict happens.
The file or files that caused the merge conflict are shown in the text editor of the IDE, and Git has made some additions to the file(s). These changes are marked by "conflict markers" which are a set ofOnce we have saved our file, we should commit and push our project so that all of our hard work in resolving the merge conflict is saved for everyone else to see. Committing and pushing after a merge conflict is the same as committing and pushing any other changes, so we follow the same steps. The only difference is that the commit message for a merge conflict by default says that it is a merge commit and which files caused the merge conflict.
<<<<<<< HEAD and >>>>>>> origin/master with a ======= between them. The <<<<<<< marks the beginning or the part of the code where the conflict occurs and the >>>>>>> marks the end of the part of the code where the conflict occurs. Below the <<<<<<< HEAD line is the line or lines of code from our file that have caused the merge conflict. The two conflicting parts are divided with the ======= symbols. Below this line is the line or lines of code from the file on the remote computer that have caused the conflict. Below these line(s) is the >>>>>>> origin/master origin/master marking the end of the conflict area. We know that the symbols chosen here make little sense. Unfortunately, while version control can be very helpful, this is one of its quirks.We now have a few options to fix the conflict. First, we must remove the conflict separators from our file; that is, we must remove the lines with the <<<<<<<, =======, and >>>>>>> symbols. We can then choose to keep our change to the file by removing the line or lines that our team member changed. Alternatively, we can choose to keep the change our team member made and remove the line or lines that we changed. A third option is to come up with a solution that keeps both changes if both changes are needed. We should follow these steps in order to resolve any other merge conflicts that exist. Once we are done resolving the conflicts, we should save our file to keep the changes.
Additional Information
Git is a useful and practical way to collaborate on teams. One useful resource in understanding it is the free Pro Git book:
Pro Git bookThis book, available online, provides a very in-depth description of what Git is and how to use it. It mainly focuses on using Git via the command line, which has more features available than Quorum Studio does out of the box. We suggest that reading through chapter 3 is sufficient for almost all anyone, even up to professional programmers.