Using Quorum on Android Devices
Quorum can be compiled to run on Android Devices.Installing Android Studio
In order to use the android application features, you must first download Android Studio and complete its installation.
Additionally, you will need to install OpenJDK, as described on the Downloads page of the Quroum website. If you have not already done so, follow the instructions there to properly install OpenJDK on your particular operating system.
Configuring Android Studio
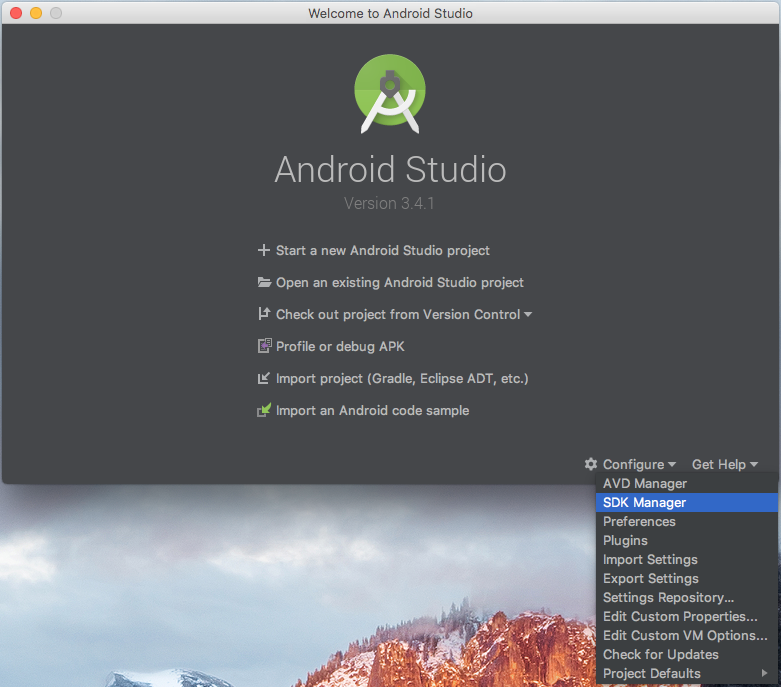
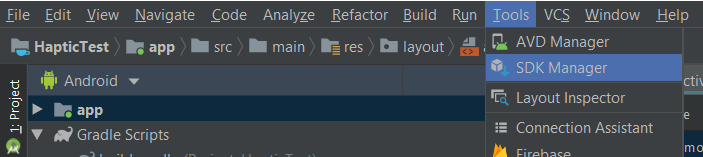
First, we need to open up the SDK Manager from either the "Configure" or "Tools" dropdown menus, as shown below.
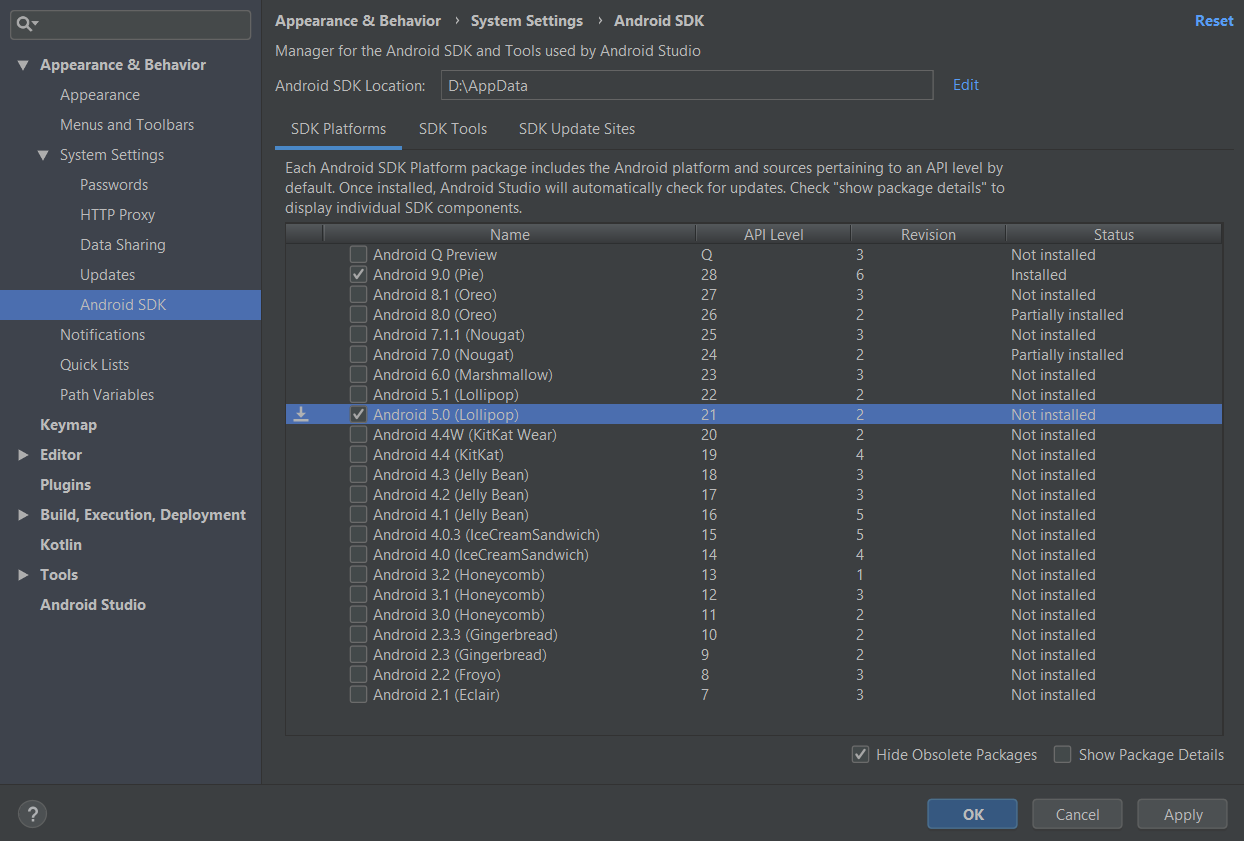
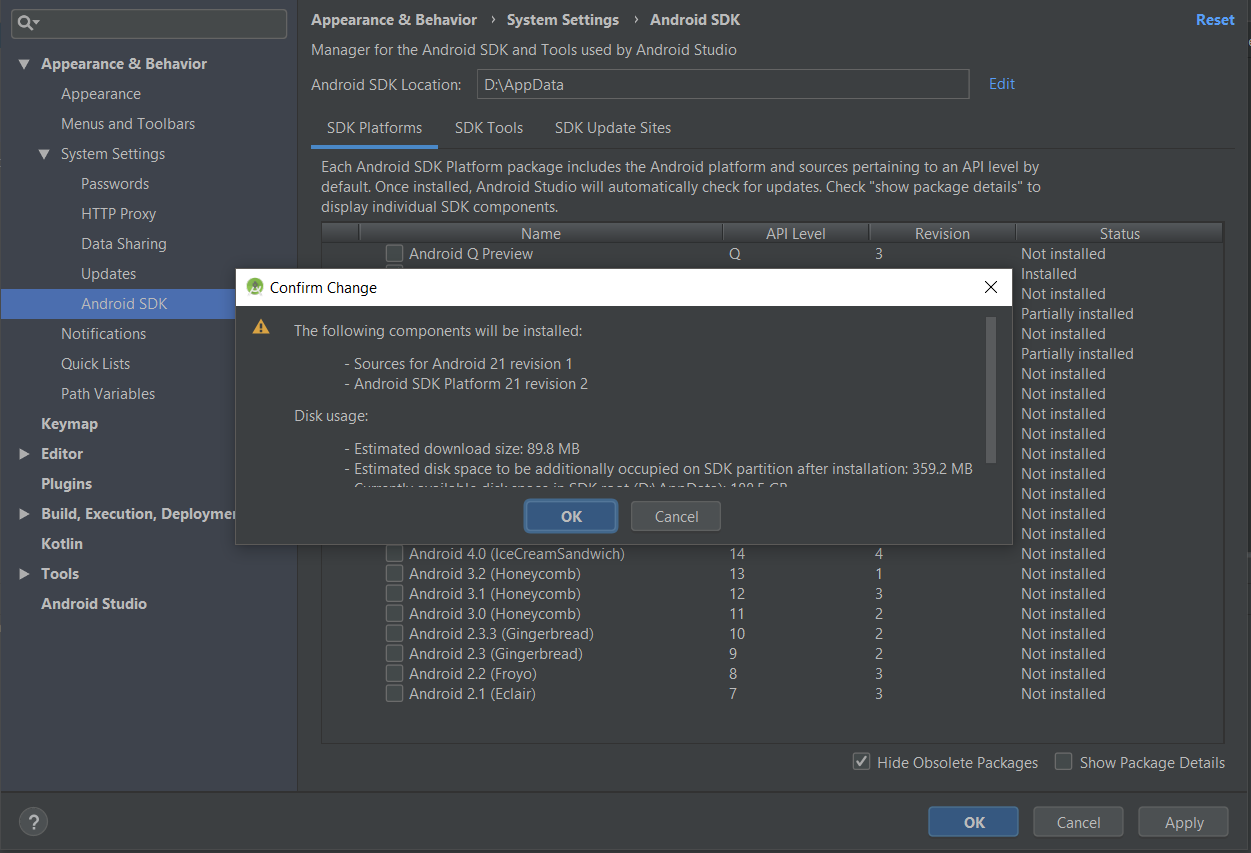
In the "SDK Platforms" tab, install Android SDK 21 by checking the "Android 5.0 (Lollipop)" box and clicking the "Apply" button. Then click "OK" on the pop-up about making changes. Then wait for the installation to complete.
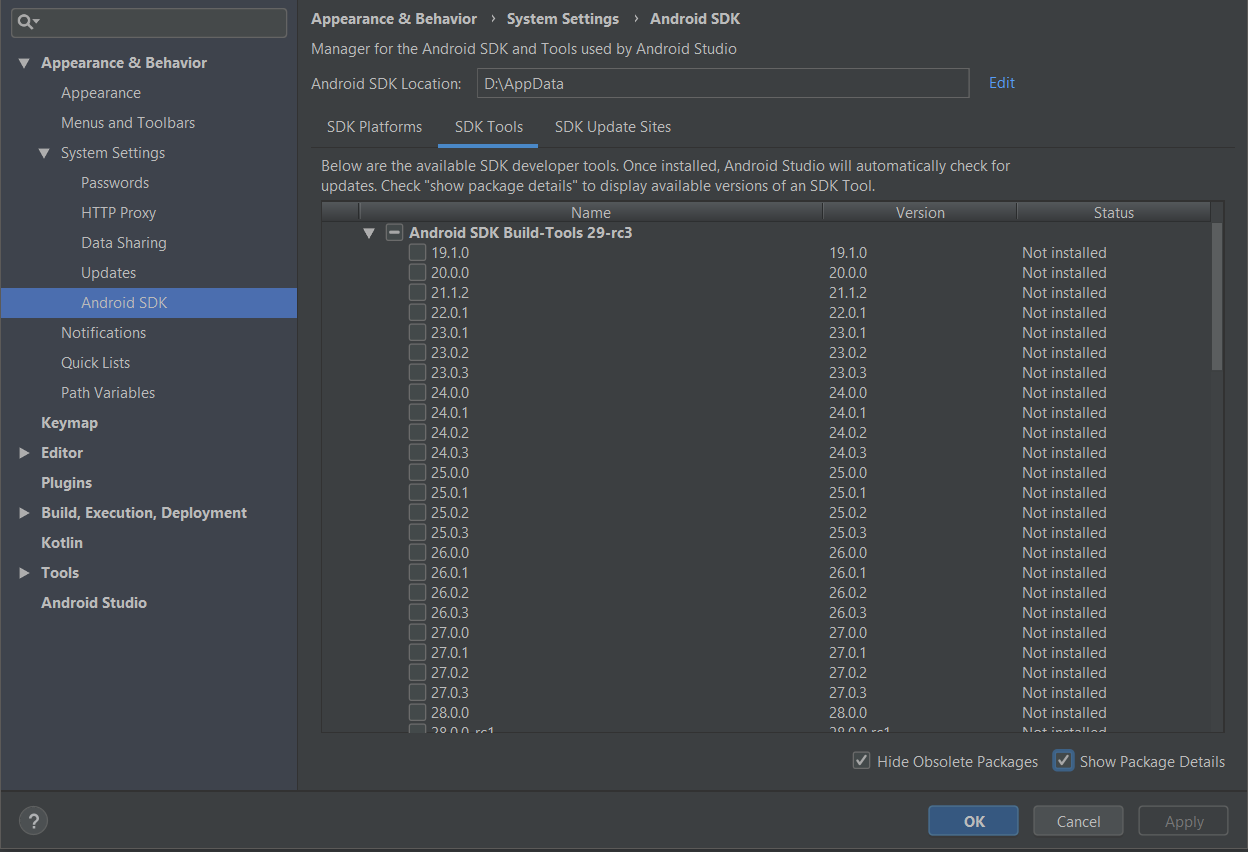
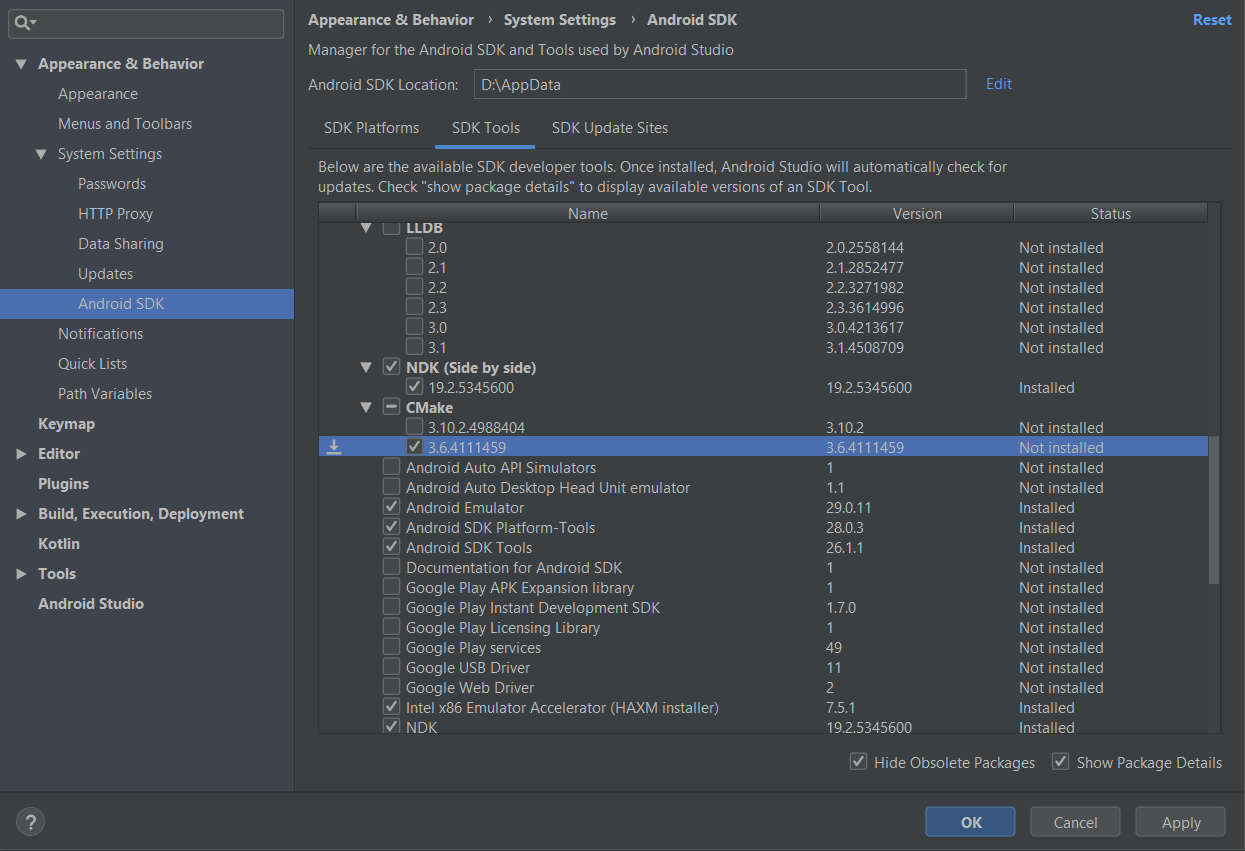
Next, switch to the "SDK Tools" tab and check the "Show Package Details" box in the bottom right corner. Then scroll down until you find the "NDK (Side by side)," "CMake," and "NDK" options. Select the NDK (Side by side) box, CMake's version 3.6, and the NDK box. Uncheck CMake's version 3.10 if it is already installed. Then click the "Apply" button and confirm the changes once more. Now you can click the "OK" button to exit the SDK Manager, and you can also exit Android Studio.
Setting Up Your Android Device
- Open the Settings application.
- Select System
- Select About Phone
- Find the section labeled Build Number and tap on the build number 7 times to enable Developer Options and Debugging on the device. When you return to the previous screen you will now be able to see the Developer Options section near the bottom.
- Click on the Developer Options
- Scroll down and enable USB Debugging on the device which will allow Android Studio and the Software Development Kit tools to recognize your Android device when it is connected using the USB for debugging.
Click the following link for more information on enabling developer options and debugging
After the Android device is set to enable USB debugging, you will need to set up your operating system to detect the device.
- For MAC OS X users, you can skip this step, the system is already setup to detect your device automatically.
- For Windows users, you will first need to install an original equipment manufacturer (OEM) USB driver for Android Debug Bridge (ADB). Click the link for more information on how to install the original equipment manufacturer (OEM) USB driver
For Ubuntu Linux users, use the command line
apt-get install android-tools-adbto install the Android Debug Bridge (ADB) tools package. This will give you the community maintained set ofudevrules for all Android devices. Additionally, you must ensure that you are part of theplugdevgroup. To check which groups you are in use command lineid. If you are not already in the plugdev group you can add yourself to the group by using the command linesudo usermod -aG plugdev $LOGNAME
Click the following link for more information regarding how to setup and connect your Android Device.
Sending Your Project to the Android Application
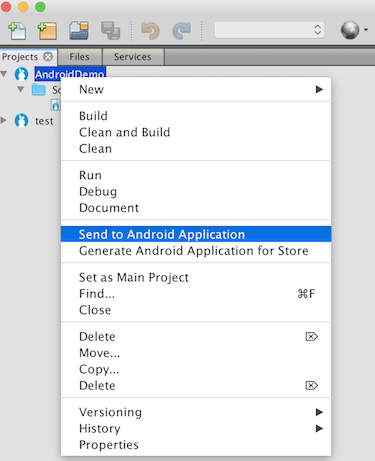
After you have installed Android Studio, the Java 8 update 211, and finished setting up your Android device, you are ready to connect the device to your computer via USB and send your project to the Android Application. The Quorum program that you are sending to the Android Application needs to use the Game class to work properly on Android devices. When your program is complete, simply plug the device in, right click on your Project in the side pane in the Quorum development environment, and select "Send to Android Application" as shown:
Your Quorum project should now appear on the Android device's screen as an application labeled "Default." Click on the application "Default" and your project will run on the Android Device. If you have to make any changes to the project in Quorum, then you will need to delete/uninstall the existing "Default" Android application on the device before resending the edited project to the Android Application.
Practice Sending a Game Project to the Android Application
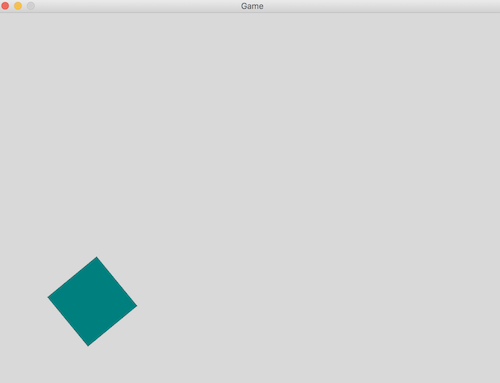
Let's try sending a program to an Android device and then running that program as an Android Application. We will start by creating a simple Game Project like the one shown below. This game will create a teal square, 100 pixels by 100 pixels, positioned 100 pixels up and 100 pixels to the right of the bottom left hand corner of the screen. The square will then rotate 30 degrees every second.
use Libraries.Game.Game
use Libraries.Game.Graphics.Color
use Libraries.Game.Graphics.Drawable

class Main is Game
   Color color
   Drawable drawable
   action Main
       StartGame()
   end
   action CreateGame
       drawable:LoadFilledRectangle(100, 100, color:Teal())
       drawable:SetPosition(100, 100)
       Add(drawable)
   end
   action Update(number seconds)
       drawable:Rotate(30 * seconds)
   end
end
You can test the project in Quorum first to make sure that everything runs as expected (there are no bugs) before sending the project to the Android Application. After everything is running correctly, you can send the game to the Android Application by following the instructions above which include right clicking the project name in the side pane of the Quorum Development Environment and selecting "Send to Android Application." The program will show up as an application labeled "Default" on the device with the output on the screen of the Android Device matching the output from when you ran the project using the Quorum development environment.
The output from the above example should look similar to this (with the square demonstrating a rotating action).
Next Tutorial
In the next tutorial, we will discuss Apple Mobile, which describes how to use Quorum on an Apple iOS device..