An Introduction to Robots in Quorum
In this tutorial, we will focus on setting up a LEGO™ EV3 Mindstorms robot to run Quorum programs, as well as discuss the fundamentals behind using Quorum to write programs for the robot. Specifically, we will cover:
- Installing software on the robot that enables it to run Quorum programs using lejOS firmware.
- Making a robot project in Quorum Studio
- Running a program on the robot.
Setting up the robot for to run Quorum programs
Before we can run a Quorum program on a LEGO™ robot, we have to install a special kind of software called a "firmware." To accomplish this, we need to use the robot's expansion slot, which accepts a microSD card (just like many digital cameras and phones). Not all microSD cards are supported. We need one with the following characteristics: 1) must be between 2 and 32 GB of storage, 2) must not be a SDXC type card, 3) must be formatted with the FAT32 format (you can use this official SD card formatting program to accomplish this. There are many cards we can buy, but we have generally had luck with this card from Kingston. A teacher in Nebraska that creates fully loaded cards as well.
The next step is to install the lejOS firmware on the compatible formatted microSD card. Download the lejOS install files by pushing the button below and then extract the contents onto the SD card. Download the LEGO™ Robotics Installation Kit for Quorum, version 1.3 Make sure that the contents of the zip file are directly on the SD card and not in a folder. It should contain the following items (or similar ones) directly:
- lejos (folder)
- System Volume Information (folder)
- boot.scr
- ejre-8u1-linux-arm-15_may_2015.tar.gz
- hostname
- lejosimage.bz2
- netaddress
- rootfs.cpio.gz
- setup.scr
- ulmage
- version
The SD card's contents should look similar after the files are extracted:
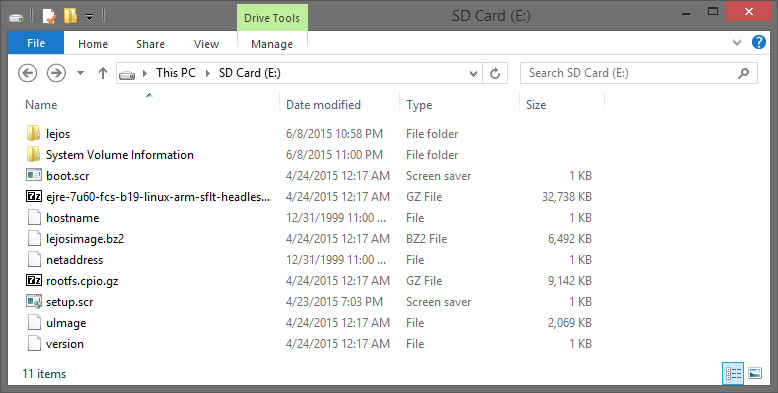
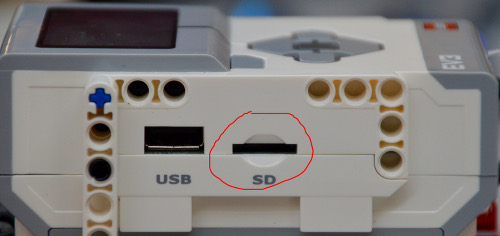
With the files on the SD card, we can now install the lejOS firmware on the LEGO EV3 brick, which is the central part of the robot that everything connects to. To do this, we need to locate the slot on the side of the brick labeled "SD" and insert the card, as shown here:
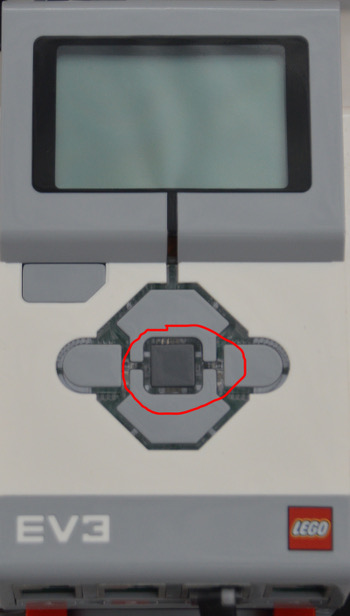
After the card is inserted, we turn on the robot by holding down the center button found on the front side of the brick, as shown here:
In about a second, the LED light surrounding the robot's buttons should display a red light, indicating that the robot is starting up, as shown here:
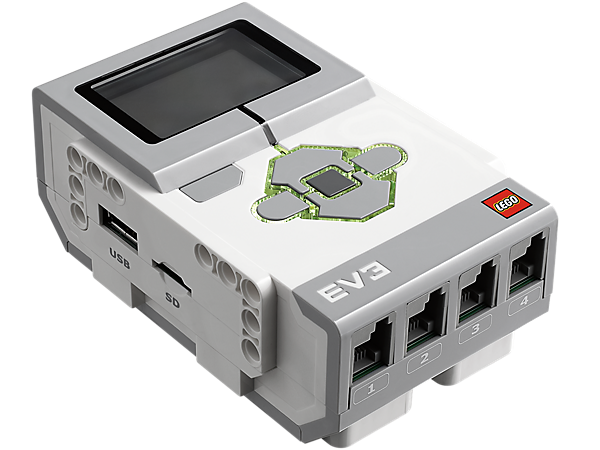
After this occurs, we let go of the button and the robot should start installing the lejOS firmware automatically. Typically, this process takes a few minutes. When the installation finishes, the robot will play a three tone piano jingle. The robot is now ready to run Quorum programs. We can explore the menu on the brick and change settings at this point. The left, right, up, and down keys navigate through menus, while the center button is used to select an option, and the escape button (top left) goes back. Next, we will learn about making Quorum Robot projects.
Making a Robot Project in Quorum Studio
Using Quorum Studio, we can create a Quorum program from a template designed for a robot. Installation help can be found on the getting started page. To create a robot project, choose New Project from the File menu, select LEGO from the categories section on the left and "then choose either of the projects below it. When this is done navigate to and press ok or hit return.
We now have a project loaded for constructing LEGOs and below is a screen shot of what our application will look like now once we open the source file. Many tutorials for Quorum go over the code for running various applications, like robots, but in this one we are not going to discuss code. Instead, we are going to move to running our application.

This program will cause the robot to play different sounds depending on whether the left or right button of the brick are pressed, or if no button is pressed. Additionally, the program will end if the escape button is pressed. In the next part of this tutorial, we will run this program on the robot.
Running a Program on the Robot
In order to transfer a program from the computer to the robot, we need to take the following steps:
- Be sure the robot is turned on.
- Connect the robot to the computer.
- Press the build button in Quorum Studio (or press COMMAND + B or CTRL + B) to send the program to the robot.
- On the robot, navigate to the main menu and select "Programs".
- Select and run the program "Default.jar".
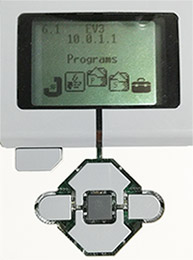
The robot should perform the instructions in the program. The LEGO brick's screen displays three different files: QuorumStandardLibrary.jar, QuorumStandardPlugins.jar, and Default.jar, in that order. These files are needed to run Quorum programs on the robot. Do not delete or change these files. If you do not see all of them , rebuild your project and they should be automatically transferred.
Finally, there are a number of additional ideas about running a robot it is good to be aware of. First, A running program can be stopped at any time by pressing the center and down buttons on the brick at the same time. Second, to turn off the robot, press the escape button on the home menu and confirm the shut down by pressing the right button and then the center button. Third, we can change a Quorum project's type at any time, by adjusting its project properties. For example, we can change the name generated from Default to something of our own choosing. Finally, for a complete list of actions available for the robot, please refer to the documentation for all Quorum libraries and search for the package Libraries.Robots.Lego.
Driver Installation Problems on Windows
Note: If your LEGO robot connects normally to your computer, skip this section. You do not need it.In testing, we have noticed that some Windows machines have difficulties installing the appropriate software for the LEGO robots (called "drivers"). We did not write this software, nor do we control Windows' approach for installing drivers, but in the unlikely case that your computer does not appear to connect to the LEGO robot, we have found that these steps seem to resolve it:
- Go to the device manager (in the control panel)
- While the EV3 is on, find it in the device manager. It should be located under the "Network adapters" submenu, listed as "USB Ethernet/RNDIS Gadget" or something similar. In some cases, it has a number at the end (e.g., #2 at the end)
- Right click or use the keyboard on the device and select "Update Driver Software..."
- Select the option to browse your computer for the driver manually
- Select the option to pick from a list of device drivers on your computer
- Click or use the keyboard to get to "Have Disk..." to open a window where you can point Windows to a specific driver
- Click or use the keyboard to select "Browse..." and navigate to C:\Windows\System32\DriverStore\FileRepository\"rndis folder with a possibly unique name". This folder has a very unintuitive name starting with the phrase "rndis" For example, on one machine, it was called rndis.inf_amd64_1fb2b40d582448a7 during our testing. Once you have found it (the hard part), select or click "Open"
- Then click or select OK to close the "Install from Disk" window
- At this point, this should take us back to the main window and only one driver should be listed. Click Next and it will install the driver.
Next Tutorial
In the next tutorial, we will discuss Motors, which describes how to use lego motors.