Moving and Animating in 2D with Quorum
This tutorial tells you how to move and animate items on a screen in 2 dimensionMoving and Animating Items
This tutorial will discuss how to make items move, rotate, and scale in your game as well as how to do animation. To assist with this tutorial, you can download this zip file which contains a project with an ImageSheet and all the images used in this tutorial.
Moving Items
- include your use statement for the Drawable library
- instantiate a Drawable (call it "spaceship" for this example)
- load an image into the Drawable (use "assets/alien.png" for this example)
- add the Drawable to the game
Your code should look like this:
use Libraries.Game.Game
//this line includes the Drawable library
class Main is Game
    // this line declares our drawable object
    Drawable spaceship

    action Main
        StartGame()
    end

    action CreateGame
        // this line loads the image file to our Drawable
        spaceship:Load("assets/alien.png")

        // this line adds the drawable to the game
        Add(spaceship)
    end

    action Update(number seconds)
    end
end
In order to move the object we need to set its new position on the game screen. Every Drawable has a set of properties attached to it. Two of those properties are its x and y position on the game screen. By default, Drawables are located at position (0, 0), which is the bottom left of the screen. Since we haven't previously set new coordinates, all the objects we've drawn so far have been positioned at the default (0,0) position. If we want to position an item in a different location, we can use the SetX and SetY actions that are part of the Drawable class. These actions both take a number parameter that represents the new x or y coordinate of the Drawable. The modifications to the code below set the x and y coordinates of our spaceship to a new location:
use Libraries.Game.Game
use Libraries.Game.Graphics.Drawable

class Main is Game
    Drawable spaceship

    action Main
        StartGame()
    end

    action CreateGame
        spaceship:Load("assets/alien.png")
        Add(spaceship)

        // this line changes the x position of our spaceship drawable to be at 100.
        spaceship:SetX(100)

        // this line changes the y-position of our spaceship drawable to be at 50.
        spaceship:SetY(50)
    end

    action Update(number seconds)
    end
end
The result of this code is shown in the screenshot below.
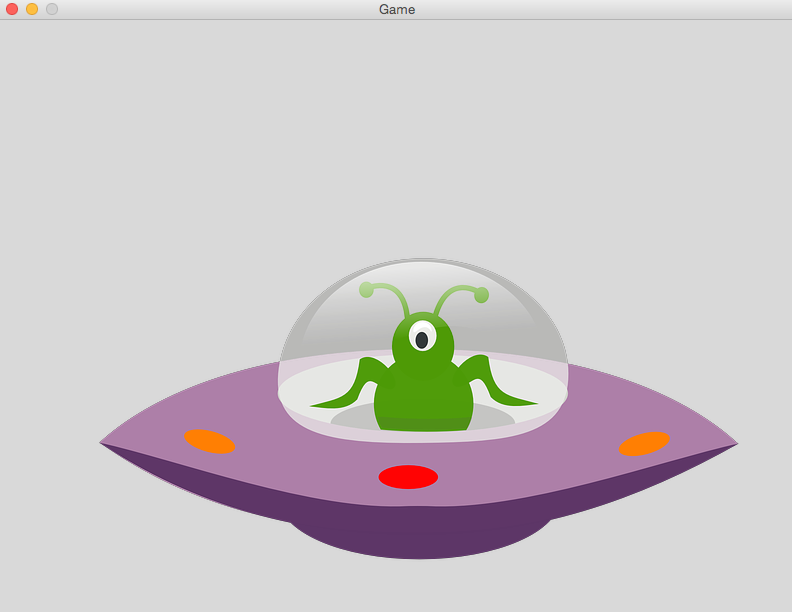
The code above places the image to the position specified as it's initial position on the game screen.
To achieve smooth movement across a number of frames, we must move the image incrementally over a period of time. To do this, we can take advantage of our Update action, which you may remember is called by the engine on each frame while game's main loop is active.
If we want to insert movement code in the update action, navigate to the Update(number seconds) action. This is where we write our code to move the Drawable across the screen on each frame. To do this, we need two number parameters that represent the new x position and the new y position calculated during the game's main loop. We can calculate the new x and y positions by getting the current x and y positions plus some speed value multiplied by the seconds parameter. (Remember that the seconds parameter is the amount of time elapsed since the last time the Update action was called by the engine. The speed value represents how many pixels to move across the screen in a second. So, if the number chosen is small, the movement will be slow, maybe even too slow to see! Likewise, if the number chosen is too large, the movement will not appear smooth; instead, the Drawable will appear to jump across the screen. Play around with different speed values to see their effect.
An example of code that moves a Drawable across the screen is below.
use Libraries.Game.Game
use Libraries.Game.Graphics.Drawable

class Main is Game
    Drawable spaceship

    action Main
        StartGame()
    end

    action CreateGame
        spaceship:Load("assets/alien.png")
        Add(spaceship)
    end

    action Update(number seconds)
        // these two statements calculate the new x and y positions by getting the current x and y
        // positions of the Drawable and adding a "speed" factor multiplied by seconds
        number newX = spaceship:GetX() + 100 * seconds
        number newY = spaceship:GetY() + 50 * seconds

        // this statement sets the new x and y positions of the drawable to the values just
        // calculated.  Note we can use SetPosition to set both X and Y at the same time.
        spaceship:SetPosition(newX, newY)
    end
end
If we run our program now (F6), we will see our spaceship glide across the screen in the upwards diagonal direction until it eventually leaves the screen.
Rotating and Scaling Images
In addition to moving across the screen, Drawables can also be rotated, flipped, and scaled using the Quorum Games Library. This section will cover how to rotate, flip, and scale your Drawable during your game. Drawables can be rotated, flipped about an axis, or scaled during a game. Internally, Drawables store information relating to their orientation about a 2D axis, including the degree of rotation and whether the Drawable has been flipped across the x or y axis, and whether the Drawable has been scaled.
Rotation
Let's start with rotation. Drawables have actions that allow us to change their rotation in our game. The SetRotation action takes a number that represents the rotation angle in degrees. So, passing a value of 90 to this action will rotate our Drawable 90 degrees in the clockwise rotation. Negative values can be passed to this function as well, having the effect of changing the direction of rotation. For example, passing a value of -90 to the SetRotation action will rotate the Drawable 90 degrees in the counter-clockwise direction. An example use of the SetRotation action is below.
use Libraries.Game.Game
use Libraries.Game.Graphics.Drawable
class Main is Game
Drawable spaceship
action Main
StartGame()
end
action CreateGame
spaceship:Load("assets/alien.png")
spaceship:SetPosition(100, 100)
// this line causes the spaceship to be rotated 45 degrees in
// the counterclockwise direction
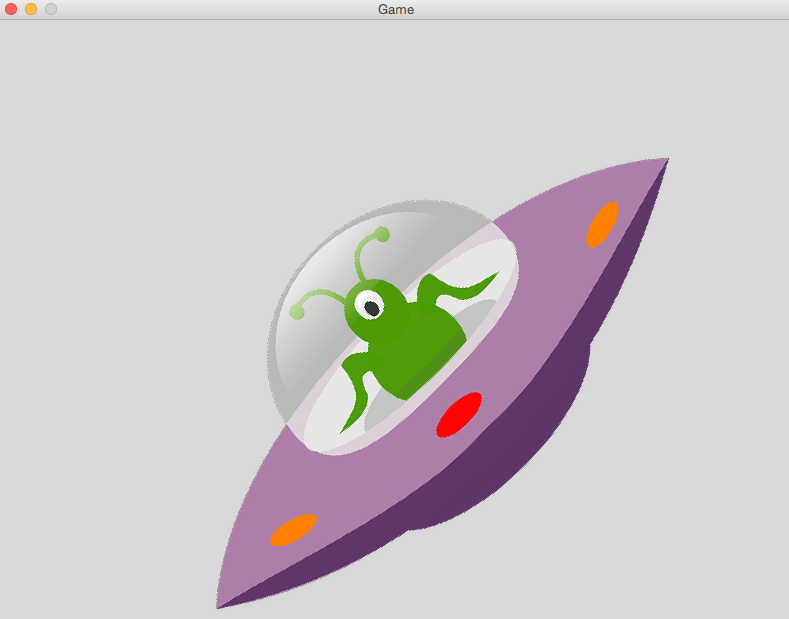
spaceship:SetRotation(-45)
Add(spaceship)
end
action Update(number seconds)
end
endThese lines of code produce the following effect on our spaceship:
//these lines tell Quorum what libraries we will be using
use Libraries.Game.Game
use Libraries.Game.Graphics.Drawable

class Main is Game
    Drawable spaceship

    action Main
        StartGame()
    end

    action CreateGame
        spaceship:Load("assets/alien.png")
        spaceship:SetPosition(100, 100)

        // this line causes the spaceship to be rotated 45 degrees in
        // the counterclockwise direction
        spaceship:Rotation(-45)

        Add(spaceship)
    end

    action Update(number seconds)
    end
end
This code produces the same effect on our drawable as above.
So, "What's the difference between SetRotation and Rotate?" you may ask. SetRotation sets the Drawable to rotate to the degree specified by the number parameter. If our Drawable is already rotated 30 degrees when we make a call to SetRotation with 60 degrees, our Drawable will rotate 30 degrees and end up at degree 60. But if our Drawable is already rotated to 30 degrees and we call Rotate with 60 degrees, our Drawable will rotate 60 degrees from that point and end up at degree 90. A demonstration of the differences in these actions is below.
//these lines tell Quorum what libraries we will be using
use Libraries.Game.Game
use Libraries.Game.Graphics.Drawable
class Main is Game
Drawable spaceship
action Main
StartGame()
end
action CreateGame
spaceship:Load("assets/alien.png")
spaceship:SetPosition(100, 100)
// this line sets the initial rotation of our spaceship to be at 30 degrees
spaceship:SetRotation(30)
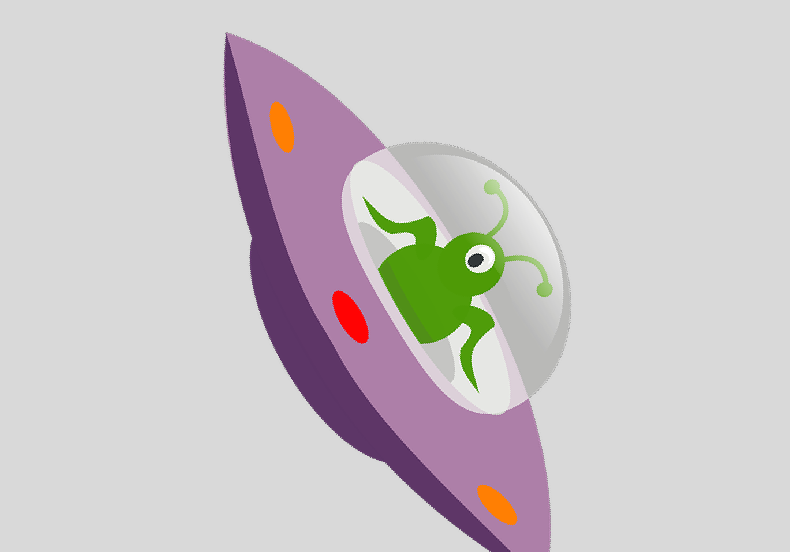
// this line tells our spaceship to rotate to degree 60
spaceship:SetRotation(60)
Add(spaceship)
end
action Update(number seconds)
end
endThe code above produces the following result:
//these lines tell Quorum what libraries we will be using
use Libraries.Game.Game
use Libraries.Game.Graphics.Drawable
class Main is Game
Drawable spaceship
action Main
StartGame()
end
action CreateGame
spaceship:Load("assets/alien.png")
spaceship:SetPosition(100, 100)
// this line sets the initial rotation of our spaceship to be at 30 degrees
spaceship:SetRotation(30)
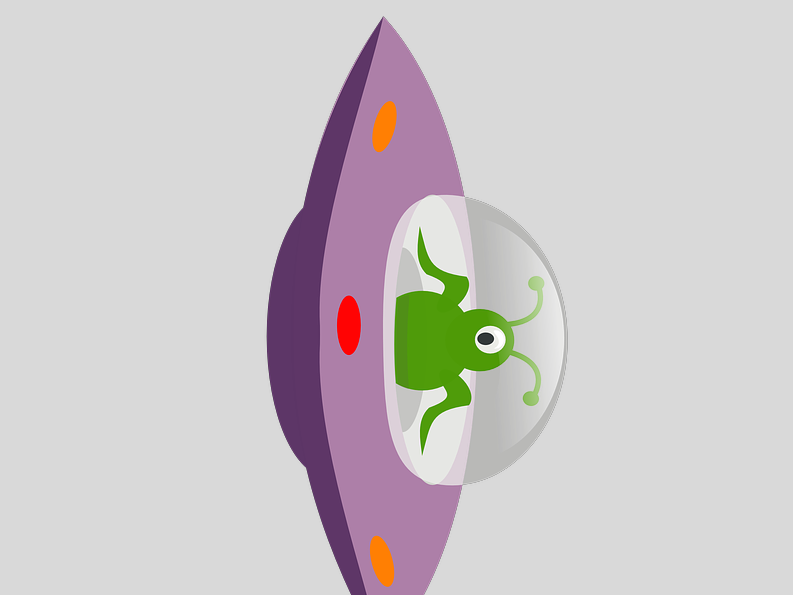
// this line tells our spaceship to rotate to degree 60 clockwise
spaceship:Rotation(60)
Add(spaceship)
end
action Update(number seconds)
end
endThe code above produces the following result:
Rotation can also be performed in the Update loop of our game to have the Drawable rotate throughout the game. Simply place the call to rotate the Drawable in the Update(number seconds) action instead of the CreateGame action. An example of this is shown below.
use Libraries.Game.Game
use Libraries.Game.Graphics.Drawable

class Main is Game
    Drawable spaceship

    action Main
        StartGame()
    end

    action CreateGame
        spaceship:Load("assets/alien.png")
        spaceship:SetPosition(100,100)
        Add(spaceship)
    end

    action Update(number seconds)
        // this line causes our spaceship to rotate 1 degree every frame
        spaceship:Rotate(1)
    end
end
The code above produces the effect of our spaceship rotating clockwise while the game window is open.
Before we can learn how to move an item around the screen, we must first create a Drawable object. Refer to the Drawing tutorial for a refresher on how Drawables and drawing to the screen works. Remember to perform the following steps:
Another option we have to rotate our Drawable is to use the Rotate action. Like the SetRotate action, Rotate takes a number parameter that represents a number in degrees that we want to rotate our Drawable. An example use of this action is below.
Flipping Images
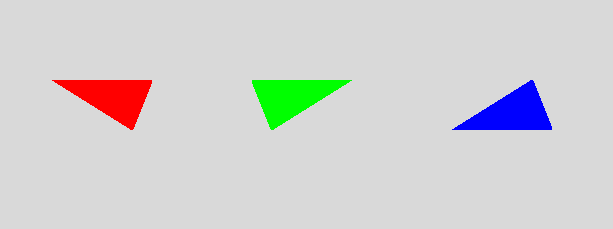
In addition to rotation, Drawables in Quorum can be flipped horizontally and/or vertically. A horizontal flip is a flip about the x-axis. To flip a Drawable horizontally, we call the FlipX action on the Drawable. A vertical flip is a flip about the y-axis. To flip a Drawable vertically, we call the FlipY action on the Drawable. Example uses of these two actions are shown below. Triangle shapes are used instead of our spaceship image because, in order to demonstrate the results of flipping vertically or horizontally, we needed an image that was not symmetrical.
use Libraries.Game.Game
use Libraries.Game.Graphics.Drawable
use Libraries.Game.Graphics.Color

class Main is Game
    action Main
        StartGame()
    end

    action CreateGame
        // create a Color object to change color of our triangles
        Color color

        // create our original triangle and set its position
        Drawable original
        original:LoadFilledTriangle(0, 0, 100, 0, 80, 50, color:Red())
        original:SetPosition(150, 200)
        Add(original)

        // create a triangle we will flip horizontally with the same vertices
        // as the original triangle and set its position
        Drawable flippedX
        flippedX:LoadFilledTriangle(0, 0, 100, 0, 80, 50, color:Green())
        flippedX:SetPosition(350, 200)
        flippedX:FlipX()
        Add(flippedX)

        // create our triangle we will flip vertically with the same vertices
        // as the original triangle and set its position
        Drawable flippedY
        flippedY:LoadFilledTriangle(0, 0, 100, 0, 80, 50, color:Blue())
        flippedY:SetPosition(550, 200)
        flippedY:FlipY()
        Add(flippedY)
    end

    action Update(number seconds)
    end
end
Notice how the vertices of all of our triangles are the same. They differ only in color and position before we flip them. Running the above code produces three triangles on our screen. The red triangle represents the original triangle. The green triangle represents the triangle we flipped horizontally, and the blue triangle represents the triangle we flipped vertically.
Scaling
In some applications, you may want to make your image appear larger or smaller on the screen. In Quorum (and many other applications), this is known as scaling. To scale a Drawable in Quorum, we can call the Scale action. This action takes a number parameter that represents the factor the image will be scaled by. For example, a number of 2 will increase the image's size by 2, doubling it. A number of 0.5 will decrease the image's size by a factor of 0.5, halving it. An example program that makes use of scaling is below.
use Libraries.Game.Game
use Libraries.Game.Graphics.Drawable

class Main is Game
    Drawable spaceship

    action Main
        StartGame()
    end

    action CreateGame
        spaceship:Load("assets/alien.png")
        spaceship:SetPosition(100, 100)

        // this line sets the scale of the drawable to be 0.25. The drawable will
        // now be 1/4 of its normal size
        spaceship:Scale(0.25)

        Add(spaceship)
    end

    action Update(number seconds)
    end
end
The image below shows the result of the above code.

Animation (Quorum Studio only)
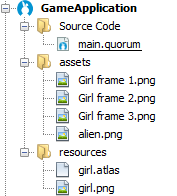
In this part of the tutorial, we will be using the ImageSheet already included in the project. If you have your own images you want to include, see the previous tutorial on Drawing for a refresher on how to create ImageSheets.
Texture Atlas
Animations in 2D games works in much the same way as Flip Book Animation. To achieve animation in Quorum, we simply change the image shown by our Drawable after a specified amount of time. It is helpful when doing animations to use a (called ImageSheets in Quorum). The ImageSheet ensures that we do not waste time loading images over and over again. Each image is loaded once and able to be used again and again.
Under the line that begins with class Main is Game we need to add a statement that instantiates an ImageSheet object. For this tutorial, we have called this object "sheet". We also need declare our Drawable here which we will call "girl" in this case.
In order to perform our animation, we need a couple of variable to track some information:
- fps: an integer variable to keep track of how many times to change frames each second
- elapsedTime: a number variable to keep track of how long it has been since the last frame change
- frame: an integer variable to keep track of which frame we are on in the animation
In this example, we are going to chage frames 4 times per second and start at frame 1. The initial elapsed time will be set to 0.
Before we can begin writing our code to change the frames, we need to set up our ImageSheet and Drawable. In the CreateGame action, we need to load our ImageSheet, set an initial image for our drawable, and add it to our game.
In order to have our drawable animate, we need to repeatedly change which image the drawable is displaying each time the elapsedTime exceeds the interval determined by the frame rate. We can do this by taking advantage of our game's main loop and write code in the Update(number seconds) action to load different images to our drawable each time the interval has elapsed. Recall from the Getting Started tutorial, the seconds parameter of the Update action is the number of seconds that elapsed between game frames. We will use this parameter and our elapsedTime variable to decide when to change frames. If the elapsedTime variable is greater than or equal to 1/fps, we know to update the frame displayed by our Drawable. If we update our frame, we need to reset the elapsedTime timer so that we can begin counting again for the next frame change. On each frame, first we add seconds to our counter elapsedTime so that it is updated with the cumulative seconds since the last update, then we test to see if it's exceeded our interval.
Additionally, we need to keep track of what frame we are showing. If we change frames, we need to increment our frame counter. Since we only have three frames, if our frame counter is greater than three, we should reset it to 1. Because our images in our ImageSheet are named in the following format: "Girl frame #"we can use our frame counter with string concatenation to access the correct drawable frame.
The code that accomplishes this animation is shown below.
use Libraries.Game.Game
use Libraries.Game.Graphics.Drawable
use Libraries.Game.Graphics.ImageSheet

class Main is Game
    ImageSheet sheet
    Drawable girl

    //this line declares a number variable representing the frame rate for the animation
    number fps = 4
    //this line creates a number variable to track the time since the last frame change
    number elapsedTime = 0
    //this line creates an integer variable to track which frame we are displaying
    integer frame = 1

    action Main
        StartGame()
    end

    action CreateGame
        //these line load the ImageSheet and initial frame into a drawable and add it to the game
        sheet:Load("resources/girl.atlas")
        girl:Load(sheet:GetDrawable("Girl frame 1"))
        Add(girl)
    end

    action Update(number seconds)
        //this line adds the seconds since the last frame to our timer variables
        elapsedTime = elapsedTime + seconds
        //this line checks if the elapsed time is greater than our interval for changing frames
        if elapsedTime >= 1/fps
            //if yes, increment the frame
            frame = frame + 1

            //if frame is greater than 3, reset it to one
            if frame > 3
                frame = 1
            end

            //now that you know the next frame, set the Drawable to the next image by
            //loading the image from the ImageSheet
            girl:Load(sheet:GetDrawable("Girl frame " + frame))

            //once we have updated our drawable, we need to reset the timer.  Instead of
            //reseting to 0, we subtract the length of time between frames to prevent any
            //extra time from building up over time, slowing our animation
            elapsedTime = elapsedTime - 1/fps
        end
    end
end
Every time you want to have animations in a game, you will have an animation loop similar to this one.
End of Lesson
You have reached the end of the lesson for 2D Graphics. To view more tutorials, press the button below or you can go back to the previous lesson pages.