Tutorial: Tree
This tutorial tells you how to use Trees in QuorumAn Introduction to Trees in Quorum
What is a Tree?
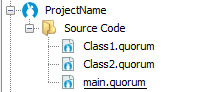
In this tutorial, we will learn how to use Trees in the Quorum Game Engine. Trees are an interface tool that represents related items in a hierarchy. For example, a Quorum Project's file directory is a Tree, which may look something like ProjectName, under ProjectName the Source Code, and under Source Code a few classes, say Class1.quorum, Class2.quorum, and main.quorum.
What is a TreeItem?
In Quorum, a Tree contains some number of TreeItem objects. A TreeItem is a node inside of our tree. In the above example, ProjectName, Source Code, Class1.quorum, Class2.quorum, and main.quorum are all TreeItems. Notice how Source Code is a TreeItem but it also has its own children: Class1.quorum, Class2.quorum, and main.quorum. Similarly, TreeItems can be added to other TreeItems to create subtrees.
For this tutorial, we will set the focus on the Tree as soon as the program starts, allowing the arrow keys to be used to navigate through the TreeItems. The Up and Down Arrow Keys move the selection up or down one and the Left and Right Arrow Keys close or open a subtree. The Enter key will activate the Behavior of the currently selected TreeItem.
The Tree we create will be able to output and say the name of which TreeItem is selected. To start, create a new Game Application project.
Tree of Color
Making the Tree
In order to use a Tree, we must include the Tree and TreeItem libraries. We will also need the Icon and Color libraries, giving us the following use statements:
use Libraries.Interface.Controls.Tree
use Libraries.Interface.Controls.TreeItem
use Libraries.Interface.Controls.Icon
use Libraries.Game.Graphics.Color
Since we want the Tree to be usable as soon as the game begins, everything we add to the main class will be in the CreateGame action. To begin, we must create an Icon to go along with each TreeItem. An Icon is similar to a Drawable, with the primary distinction being that an Icon is a Drawable and a Control. For our example, we will use a small circle or rectangle icon next to each TreeItem to represent which color that item represents with the following lines of code:
Color color

Icon iconA
Icon iconA_1
Icon iconB
Icon iconB_1
Icon iconB_2
Icon iconB_2_1
Icon iconB_2_2
Icon iconC

iconA:LoadFilledRectangle(10, 10, color:Red())
iconA_1:LoadFilledCircle(10, color:CustomColor(1, 0.75, 0.75, 1))
iconB:LoadFilledRectangle(10, 10, color:Blue())
iconB_1:LoadFilledCircle(10, color:CustomColor(0, 0, 0.5, 1))
iconB_2:LoadFilledCircle(10, color:CustomColor(0, 1, 1, 1))
iconB_2_1:LoadFilledCircle(10, color:CustomColor(0.25, 0, 0.25, 1))
iconB_2_2:LoadFilledCircle(10, color:CustomColor(0.75, 0, 0.75, 1))
iconC:LoadFilledRectangle(10, 10, color:Green())
For the purposes of this tutorial, we suggest you simply use the values above for the CustomColor action. However, if you would like to learn more, see the documentation on the Color class.
Now we will create our Tree, as well as our TreeItem objects, using the following lines:
Tree tree

TreeItem itemA
TreeItem itemA_1
TreeItem itemB
TreeItem itemB_1
TreeItem itemB_2
TreeItem itemB_2_1
TreeItem itemB_2_2
TreeItem itemC
With our TreeItem objects created, we now need to individually set their names and their icons. This is done by calling each TreeItem's SetName and SetIcon action. Here are the lines for just ItemA:
itemA:SetName("Red")
itemA:SetIcon(iconA)
Now it is time to add our TreeItem objects to the Tree. We start by adding itemA, itemB, and itemC to our Tree. To make our subtrees, we add itemA_1 to itemA, add itemB_1 and itemB_2 to itemB, and add itemB_2_1 and itemB_2_2 to itemB_2. These tasks are accomplished with the following lines of code:
tree:Add(itemA)
tree:Add(itemB)
tree:Add(itemC)

itemA:Add(itemA_1)
itemB:Add(itemB_1)
itemB:Add(itemB_2)
itemB_2:Add(itemB_2_1)
itemB_2:Add(itemB_2_2)
Next, we will add the Tree to the game window. First we set its position, followed by a Resize action call, and finally Add. The Resize action has the Tree organize and resize its layout so the TreeItem objects can be seen; without this, the TreeItem objects would overlap on top of one another. Lastly, we will set the focus on the Tree, making our Tree accessible and allowing us to navigate it with the keyboard. This gives the following code in the main class, so far:
use Libraries.Game.Game
use Libraries.Interface.Controls.Tree
use Libraries.Interface.Controls.TreeItem
use Libraries.Interface.Controls.Icon
use Libraries.Game.Graphics.Color
class Main is Game
action Main
StartGame()
end
action CreateGame
Color color
Icon iconA
Icon iconA_1
Icon iconB
Icon iconB_1
Icon iconB_2
Icon iconB_2_1
Icon iconB_2_2
Icon iconC
iconA:LoadFilledRectangle(10, 10, color:Red())
iconA_1:LoadFilledCircle(10, color:CustomColor(1, 0.75, 0.75, 1))
iconB:LoadFilledRectangle(10, 10, color:Blue())
iconB_1:LoadFilledCircle(10, color:CustomColor(0, 1, 1, 1))
iconB_2:LoadFilledCircle(10, color:CustomColor(0.5, 0, 0.5, 1))
iconB_2_1:LoadFilledCircle(10, color:CustomColor(0.25, 0, 0.25, 1))
iconB_2_2:LoadFilledCircle(10, color:CustomColor(0.75, 0, 0.75, 1))
iconC:LoadFilledRectangle(10, 10, color:Green())
Tree tree
TreeItem itemA
TreeItem itemA_1
TreeItem itemB
TreeItem itemB_1
TreeItem itemB_2
TreeItem itemB_2_1
TreeItem itemB_2_2
TreeItem itemC
itemA:SetName("Red")
itemA_1:SetName("Pink")
itemB:SetName("Blue")
itemB_1:SetName("Cyan")
itemB_2:SetName("Purple")
itemB_2_1:SetName("Dark Purple")
itemB_2_2:SetName("Light Purple")
itemC:SetName("Green")
itemA:SetIcon(iconA)
itemA_1:SetIcon(iconA_1)
itemB:SetIcon(iconB)
itemB_1:SetIcon(iconB_1)
itemB_2:SetIcon(iconB_2)
itemB_2_1:SetIcon(iconB_2_1)
itemB_2_2:SetIcon(iconB_2_2)
itemC:SetIcon(iconC)
tree:Add(itemA)
tree:Add(itemB)
tree:Add(itemC)
itemA:Add(itemA_1)
itemB:Add(itemB_1)
itemB:Add(itemB_2)
itemB_2:Add(itemB_2_1)
itemB_2:Add(itemB_2_2)
tree:SetPosition(150, 450)
tree:Resize()
Add(tree)
SetFocus(tree)
end
action Update(number seconds)
end
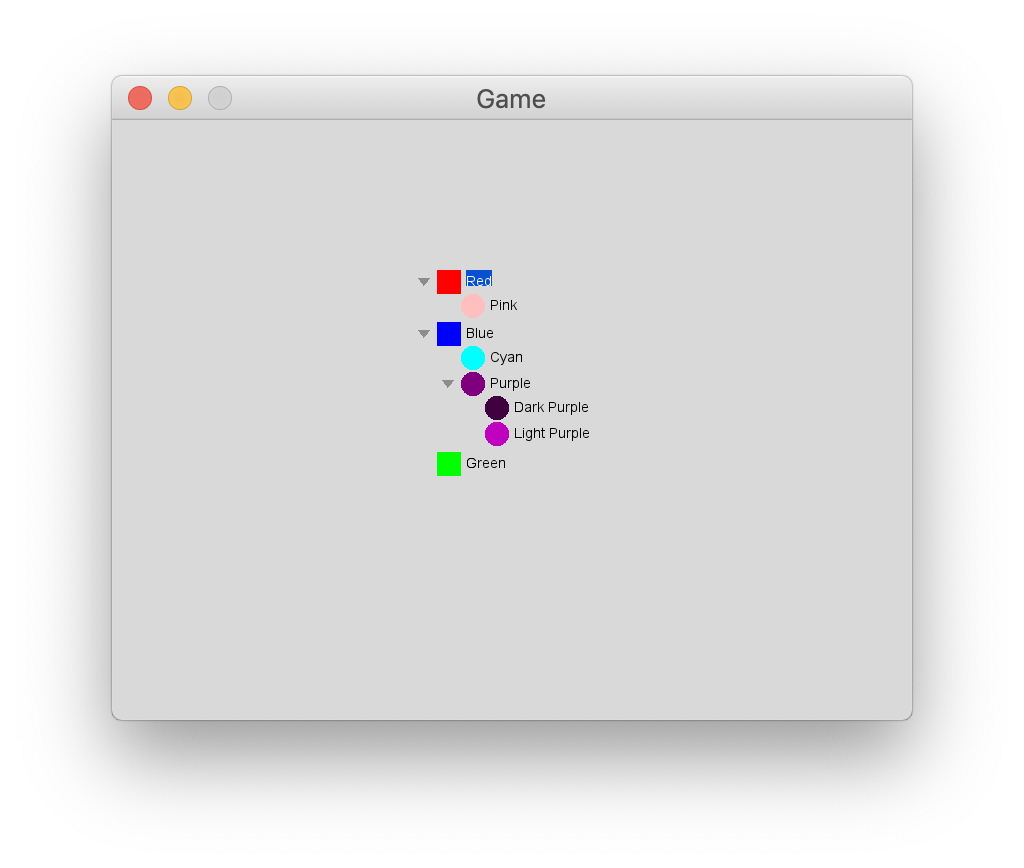
endNow, when the project is run, the Tree appears, but it does nothing aside from let us view and navigate it.
Setting a Behavior
Before we continue, we need to design the Behavior we want the activation of our TreeItem objects to take. For this tutorial we will have each TreeItem output and say their name. To do so, first create a new Quorum class, which we will name "OutBehavior.quorum."
This class will require the Behavior, BehaviorEvent, and Speech libraries. The OutBehavior class itself will inherit the Behavior class, and we will only override the Run action, giving us the following template:
use Libraries.Interface.Behaviors.Behavior
use Libraries.Interface.Events.BehaviorEvent
use Libraries.Sound.Speech

class OutBehavior is Behavior

    action Run(BehaviorEvent event)
    end
end
For the Run action, we need to get the TreeItem's name in order to output it. To do that, we can use the BehaviorEvent's GetItem action to get the object associated with the Behavior. However, the GetItem action returns an Item, so we need to cast it to a TreeItem. Once it has been cast, we have access to the TreeItem's GetName action which we will use to get the text we wish to output. Altogether, the OutBehavior class is as follows:
use Libraries.Interface.Behaviors.Behavior
use Libraries.Interface.Events.BehaviorEvent
use Libraries.Sound.Speech

class OutBehavior is Behavior

    action Run(BehaviorEvent event)
            TreeItem treeItem = cast(TreeItem, event:GetItem())

            text colorName = treeItem:GetName()

            Speech speech
            speech:Say(colorName, false)
            output colorName
    end
end
Returning to the main class, we will create an OutBehavior object for the TreeItems. Since every TreeItem will have the same behavior, we only need to make one. Finally, we simply have to assign the OutBehavior object to each TreeItem. This is done with the SetBehavior action call, using the following lines of code:
OutBehavior behavior

itemA:SetBehavior(behavior)
itemA_1:SetBehavior(behavior)

itemB:SetBehavior(behavior)
itemB_1:SetBehavior(behavior)
itemB_2:SetBehavior(behavior)
itemB_2_1:SetBehavior(behavior)
itemB_2_2:SetBehavior(behavior)

itemC:SetBehavior(behavior)
This code will be appended to the CreateGame action in our main class.
When the project is run, activating a TreeItem now causes the program to output and say the TreeItem object's name. Note that each TreeItem can be activated either by double-clicking with the mouse, or by pressing Enter on a highlighted TreeItem.
The TreeSelection Class
In Quorum, Trees have a special tool that is used to manage which TreeItem is selected. This tool is the TreeSelection class. This class keeps track of the current selection by storing the specific and unique path to the current TreeItem, storing them in an Array of TreeItems from high level to low level. For example, the path to the "Purple" TreeItem in the above example is an Array of two TreeItems, starting with "Blue," then "Purple." To demonstrate how selections work with Trees, we will add to the OutBehavior class and have it output the selected TreeItem's path when activated.
First, we will need to include a few more use statements in the OutBehavior class. These are:
use Libraries.Interface.Selections.TreeSelection
use Libraries.Interface.Controls.Tree
use Libraries.Interface.Controls.TreeItem
use Libraries.Containers.Array
Now, we can add to the Run action. After the cast statement we already have, we need to get the current TreeSelection, which can be obtained from the current Tree. Since we are triggering the Behavior from a TreeItem variable in the main class, we can obtain the Tree from the TreeItem associated with the BehaviorEvent parameter. Then, we get the selection from the Tree. This is done with the following lines:
TreeItem treeItem = cast(TreeItem, event:GetItem())
Tree tree = treeItem:GetTree()
TreeSelection selection = tree:GetSelection()
Now that we have our TreeSelection, we can call the TreeSelection's GetPath action to obtain the Array of TreeItems. For more information, see the tutorial on Arrays. Once we have the Array, we can obtain how many TreeItems there are with the Array's GetSize action. This gives the following two lines:
Array<TreeItem> treeItems = selection:GetPath()
integer size = treeItems:GetSize()
Since we do not know ahead of time how large the path is, we need to make use of repeating, specifically repeat while. In this repeat, we will traverse the Array in order and continually add each TreeItem's name to a text variable. For more information, see the tutorial on Repeats. Finally, we will output the text variable once the repeat is completed. This gives the following lines of code:
integer counter = 0
text name = ""

repeat while counter < size
    TreeItem temp = treeItems:Get(counter)
    name = name + temp:GetName() + "\"
    counter = counter + 1
end

output name
Now, when we run the program, activating a TreeItem will also output the path to that TreeItem.
Make a User Interface
Next Tutorial
In the next tutorial, we will discuss TextBoxes, which describes how to use TextBoxes.