Hour 10: Create an Accessible App - Part 1
This lesson is to teach you about the Forms library to make an accessible app.Overview
In this lesson, you will bring together the concepts you have learned to build an app using Forms. As you learn how to build Form apps, you will learn the importance of user interface design.
Goals
You have the following goals for this lesson:
- Create a Form
- Learn about the different kinds of items you can add to forms
- Build the interface for an app with at least 1 button
- Understand the purpose for user interface design
Warm up
Think about apps or websites you have used in the past. Can you think of examples of apps or sites that were easy or hard to use? What kinds of things made the difference for you between a good or bad experience?
Vocabulary
You will be learning about the following vocabulary words:
| Term | Definition |
|---|---|
| Forms | A library for creating interactive user interfaces |
| User Interface | A product’s appearance, interactivity, usability, behavior, and feel. |
| User Interface Design | A person's perceptions and responses that result from the use or anticipated use of a product, system or service. |
| Design | A plan or prototype that demonstrates the look or function of a product before it is built |
| Button | A control element that provides a way for a user to trigger an event |
Code
You will be using the following new pieces of code:
| Quorum Code | Code Example | Explanation |
|---|---|---|
| use NAME | use Libraries.Interface.Forms.Form | A use statement for the Form object, which is the primary window for an app. |
| use NAME | use Libraries.Interface.Forms.Page | A use statement for the Page object. A form can flip between pages as part of an app. |
| use NAME | use Libraries.Interface.Controls.Button | A use statement for the Button object. A button can be selected to take an action. |
| Form NAME | Form form | A variable declaration that makes a new Form. |
| Page NAME | Page page | A variable declaration that makes a new Page. You can use the assignment operator on page with a Form |
| Button NAME | Button button | A variable declaration that makes a new Button. You can use the assignment operator on page with a Form. |
| FormObject:GetMainPage() | form:GetMainPage() | Assigns the main page of the form app. This is a formality and typically used for navigational purposes. |
| FormObject:AddButton(title) | form:AddButton("Click me!") | Inserts a button into the interface of the Form app |
| FormObject:Display() | form:Display() | When run, the program displays the running app via a Game window. |
CSTA Standards
This lesson covers the following standards:
- 2-CS-01: Recommend improvements to the design of computing devices, based on an analysis of how users nteract with the devices.
- 1B-CS-02: Model how computer hardware and software work together as a system to accomplish tasks.
Explore
When you hear the term "design" you might think of the interior design of someone’s home, paintings in a gallery, or something related to art. Design is a much broader term, however, with applications that venture into technology and many other areas.
Many programmers methodically design code and programs to make the most sense to human comprehension. A growing field in the industry is Human Computer Interaction, where their role is to plan, strategize, and design apps and physical products for consumers or ensure a product fits a business’s needs.
Think about many of the apps you have used on your smartphone. Often, teams of developers and designers have worked together to produce a refined version of these apps which cater to what users want. This concept is called “user experience”, or sometimes shortened to "UX" design. The basic idea is you want the user to feel like their needs were taken into account in the design.
Accessibility in Design
Accessible design is an important concept for designers to make sure products can be used by everyone. A major consideration that designers should follow as applicable are the Web Content Accessibility Guidelines (WCAG), which focuses on accessible design on digital products (especially websites). WCAG is unusual in that it dovetails ideas in design, like how a web page is structured, but also serves as legal guidelines from the U.S. Department of Justice as of 2024 [1]. The changes made by this rule are significant, arguably a sea change, in that they require accessibility to be the default under certain conditions. There is plenty of nuance to be considered, but here are some examples of the type of information related to WCAG:
ARIA Labels: Providing adequate information for screen readers and other accessibility tools, sometimes including the use of ARIA or app structure.
- Alternative Text (Alt-Text) on images and diagrams.
- Requiring appropriate color contrast for readability by anyone, but especially those with low or limited vision
- Providing transcripts for audio resources and subtitles for video resources.
When you begin programming your own apps, one thing you can do to make your apps feel more accessible is to ensure that all of your labels and buttons have meaningful, clear, names. This allows any user to understand what is happening in your programs, even if they are using accessibility tools like a screen reader.
Most programming languages support libraries for accessibility, in one form or another, but they vary considerably. Sometimes, features that may not seem accessibility related are. For example, languages must support keyboard navigation, present information to screen readers, and support some method for interacting with the operating system's accessibility layer. Further, languages can make it easier or harder to make applications accessible. With color, another common issue in accessibility, if a language makes non-WCAG compatible choices with color contrast, some or many users may find an application harder to read.
Creating an App
Most programming languages have some mechanism for creating applications or apps, but what that even means varies. For Quorum specifically, apps are coded in one language and in one way, then generated for each platform you are on. The idea is you can write an app once, then run it on desktop, on the web, or on your phone.
The library you will be focusing on for this lesson is the Form library. The Form library lets you add buttons, input fields, banners, images, etc. and program all these features so that they work with one another. In this lesson, you will learn about the structure and some basic elements within the Form library.
Accessing the Form Library
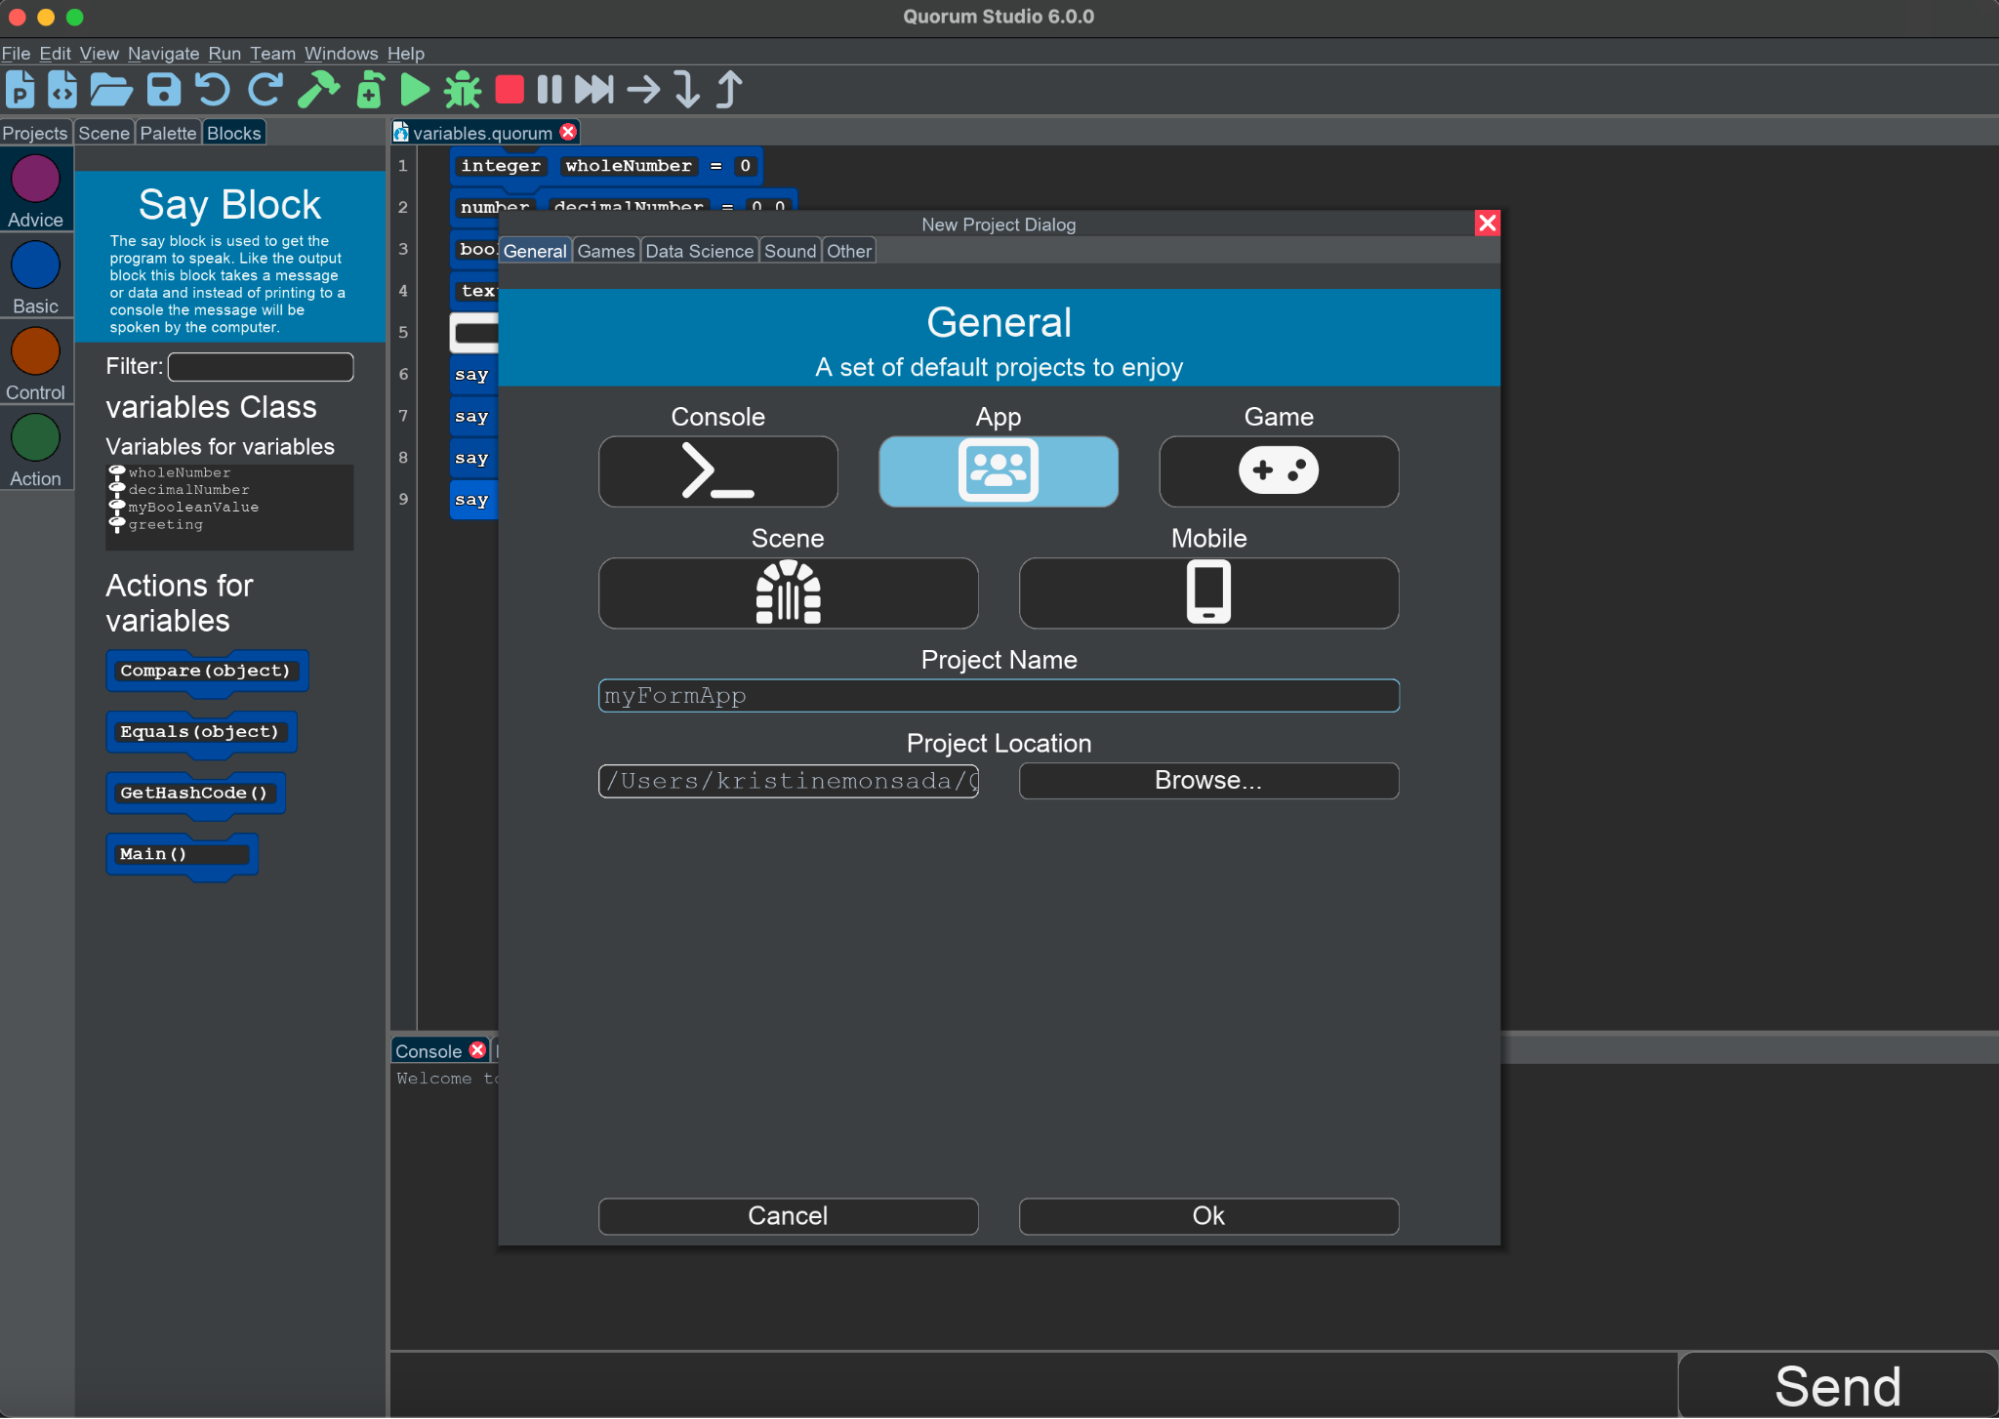
There are two ways to access the Form library. The first is to create a new project and use the default template. For this, you go to the File Menu and select the New Project button. Similar to how you have been creating console projects, the "App" project will provide a template for how the program should be structured. Give your project a name and press the "Ok" button once you are ready to start.
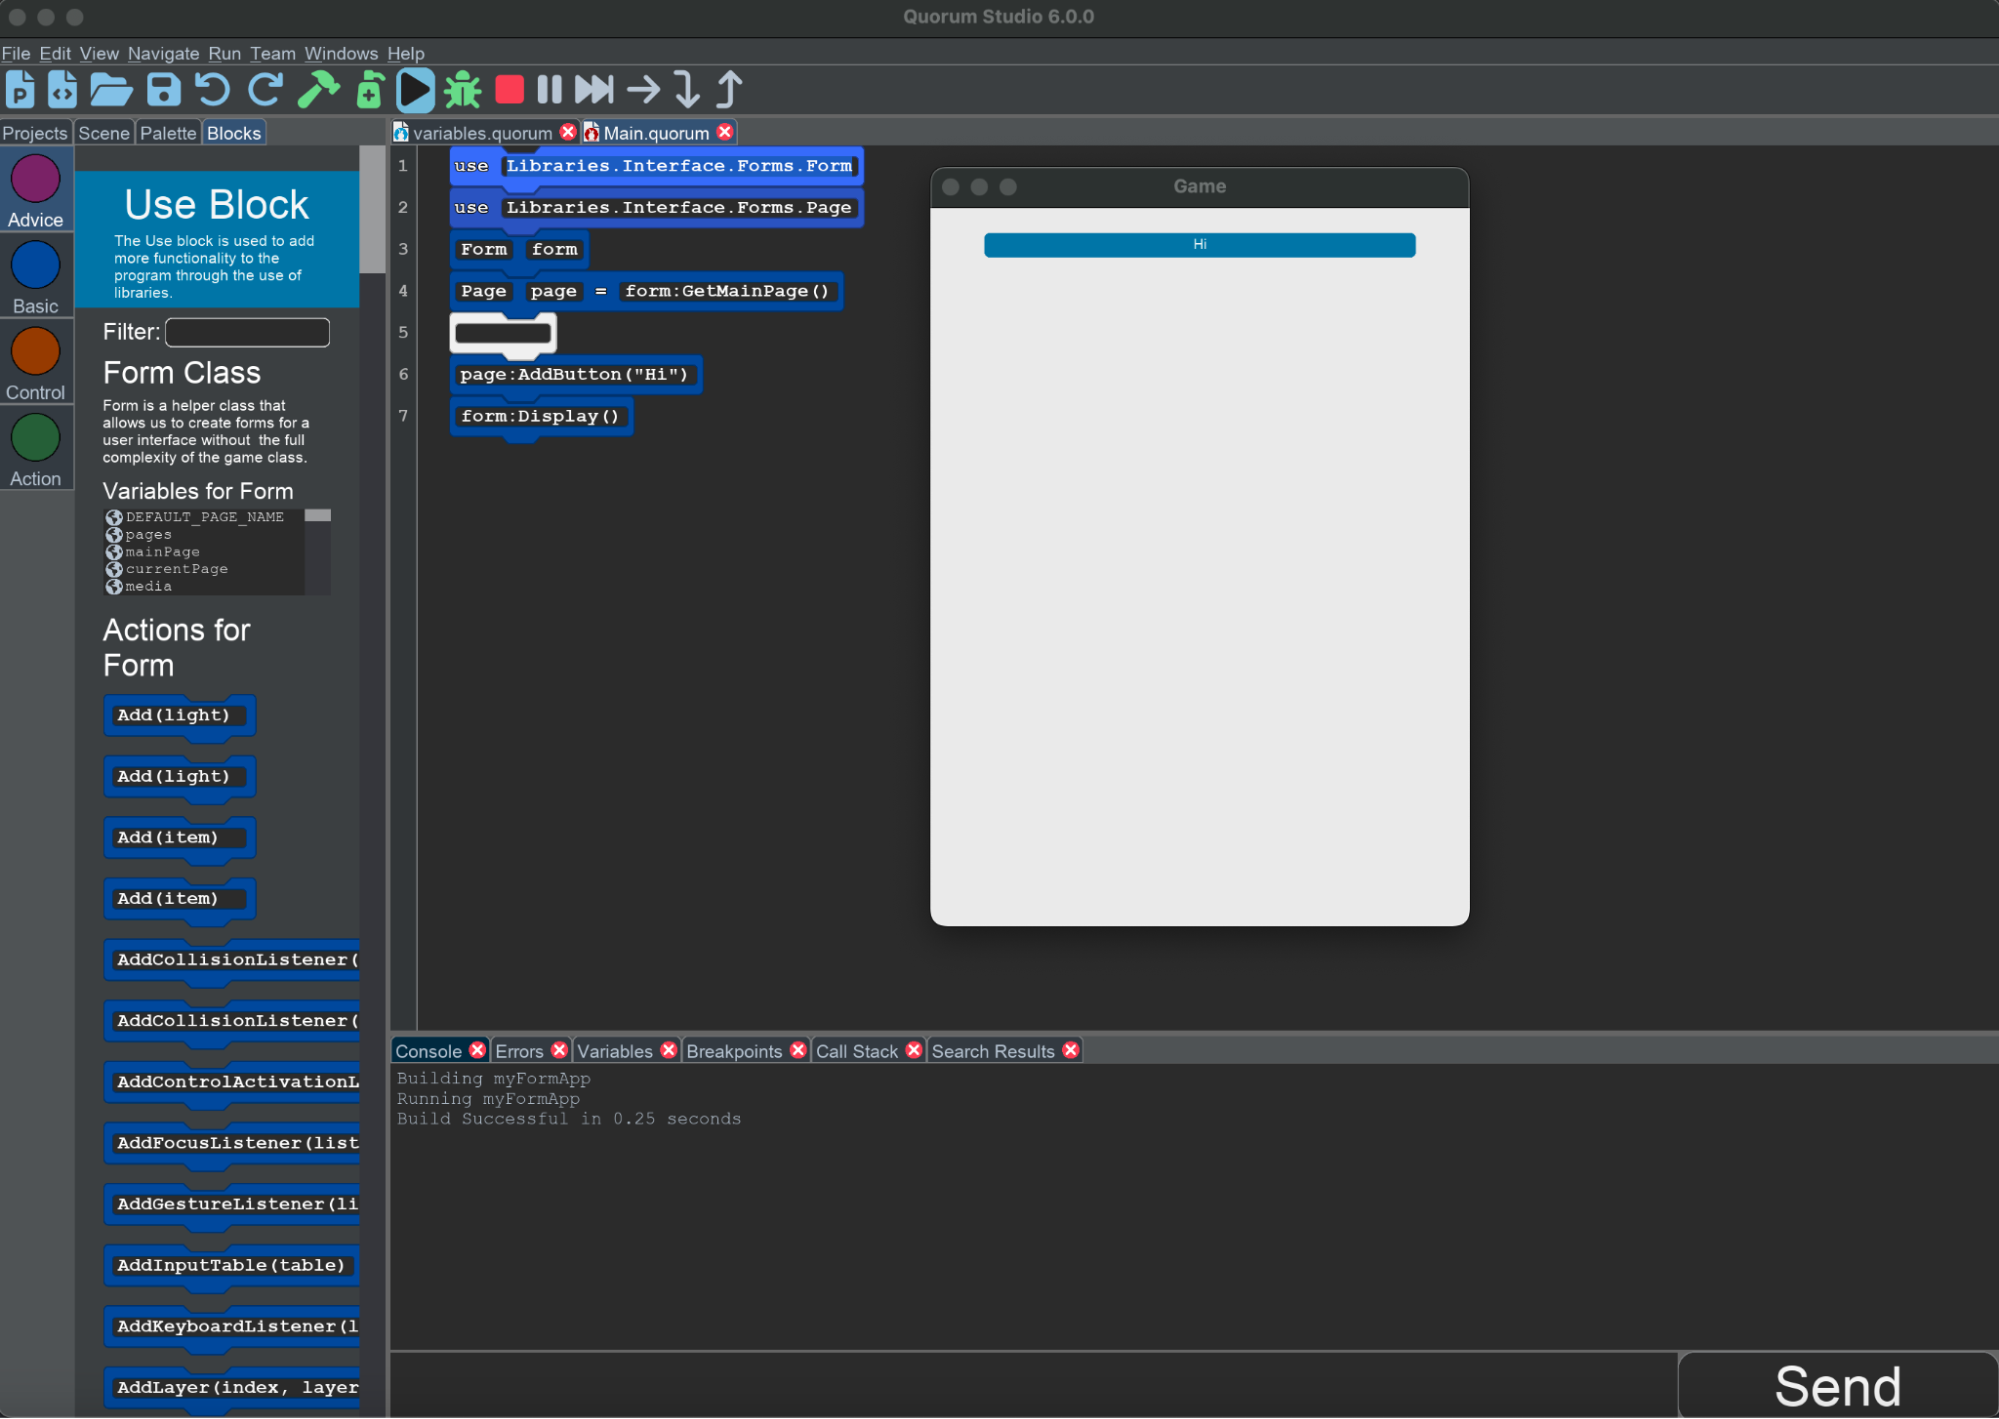
On first glance, notice that your project already has code provided. This template creates a default, puts a button labeled Hi on it, and loads it. Notice you do not need to embed any additional accessibility information. The application is automatically born accessible.
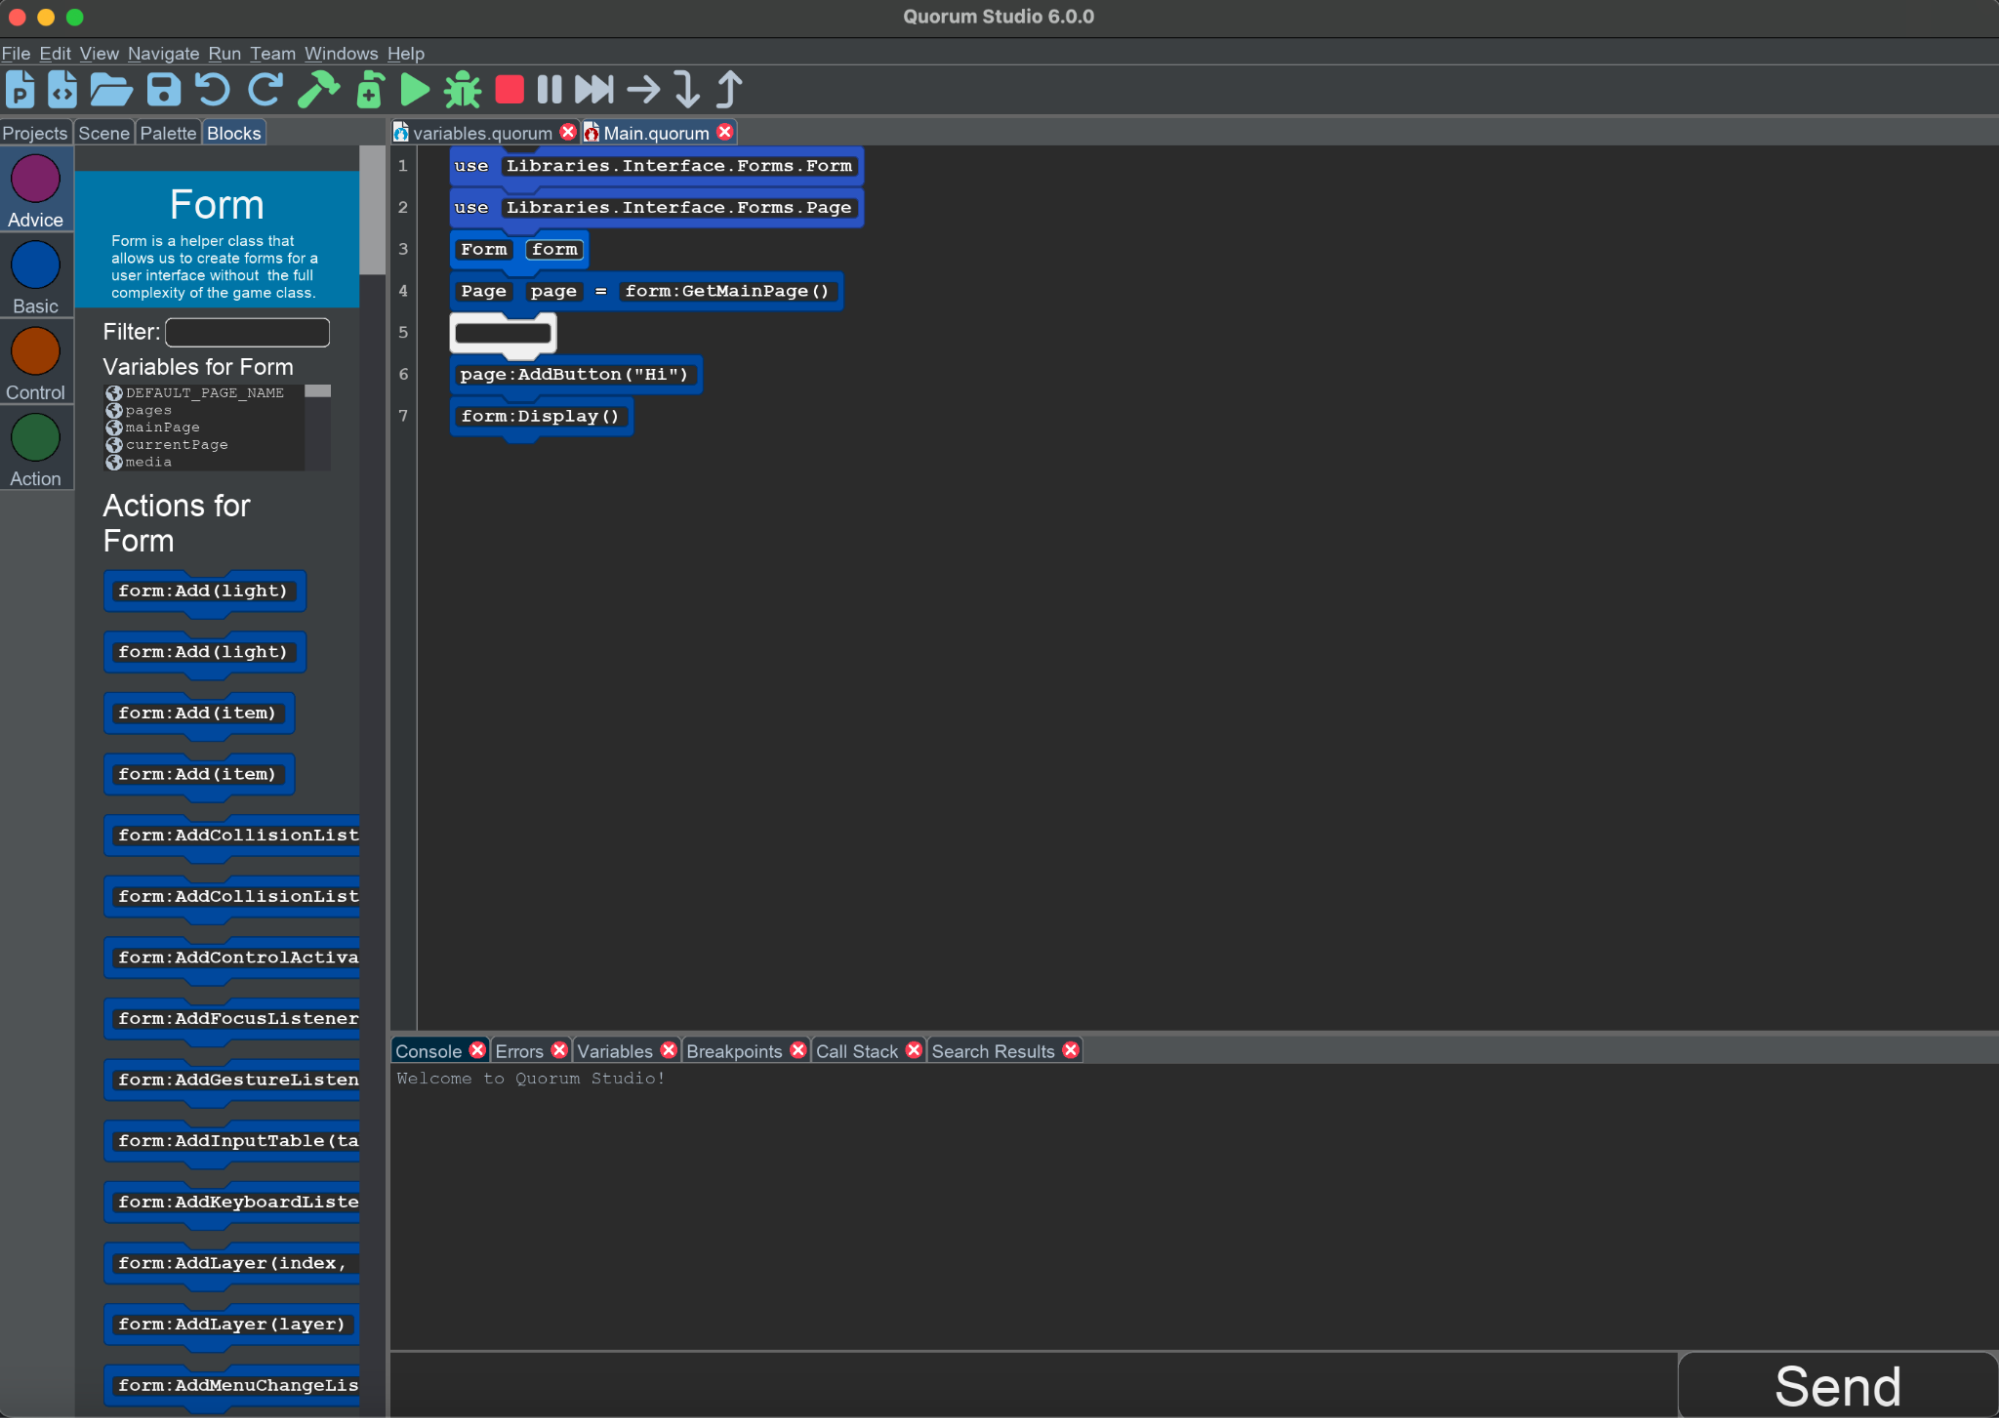
The first two lines, use Libraries.Interface.Forms.Form and use Libraries.Interface.Forms.Page are the libraries that contain all the objects required to create the form app. The next line, Form form, creates your form object. The Form object is a graphical display that will open a window for your app to run in. Forms are also in charge of storing and keeping track of the different pages in your app. Some users prefer to give an object a different name (e.g., not "form" to avoid it being the same), but this falls well within personal preference.
The next line reads Page page = form:GetMainPage(). A Page is a single screen on your app, including all of the buttons, labels, and other elements that will be on that screen. Just like viewing people’s profiles on Instagram or TikTok, the new displays are new pages.
When you use form:GetMainPage(), you are requesting that the system gives you the first Page that will be displayed when the app starts, otherwise known as the main Page. Any kind of interactive user interface component, like buttons, text boxes, fields, lists, trees, or other items, are added to a page.
Now that you have a Page, you add elements directly to it. This will make your elements appear on the screen. You can see the next line is page:AddButton("Hi"). This will add a button with a label that says "Hi" on the first page of the app. Screen readers and other accessibility clients will read that the button is named "Hi." If you prefer, you can change the name of the item or the description, which alters what accessibility devices would obtain.
The text form of this code is as follows:
use Libraries.Interface.Forms.Form
use Libraries.Interface.Forms.Page
Form form
Page page = form:GetMainPage()

page:AddButton("Hi")
form:Display()
Finally, in order to actually use the app, you use form:Display(). This will make the Form open the window and display the main Page.
While the template is convenient for creating a Form, it is not required. You could also choose to begin with a blank project and manually type out the libraries and the objects. While this method might be more tedious, all the information is the same. The key elements you should always include in your Form programs should be:
use Libraries.Interface.Forms.Form
use Libraries.Interface.Forms.Page

Form form
Page page = form:GetMainPage()

form:Display()
These five lines of code will be in most Form programs you create. All the other pieces of code are for you to explore and learn to practice creating user interfaces.
Adding a Button
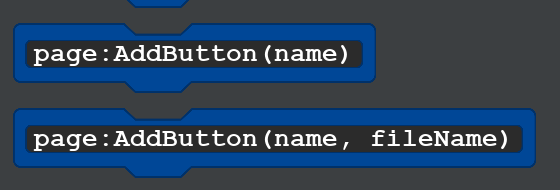
In order to add a button to your app, you must add it using the Page object by using page:AddButton(name). The button’s label (and also the button’s name) will match the text you provide to the action.
Alternatively, if you have an image file (such as one with the extension JPG or png), you can make a button using that image. In this case, you can use page:AddButton(name, filename), where the filename is a path to where the image is located. The path is always relative to your project’s location on your computer, so if you use this option, it is highly recommended you store your image files in your project folder.
Adding Labels
To add text labels to your app, you need to add a label to the Page by using page:AddLabel(name). The provided text will be both the label’s name as well as the text that it displays. By default, labels can be navigated by a screen reader.

Adding a Banner
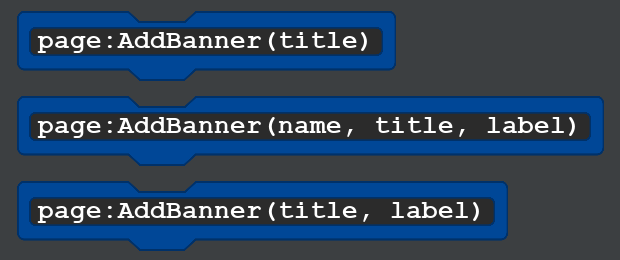
A Banner is a more complex element that can include multiple parts. How many parts are present in your app depends on how much information you give the action to make it. If you provide just a single piece of information using page:AddBanner(title), the banner will have a single label with your given text.
Alternatively, if you give a second piece of text using page:AddBanner(title, label), the banner will have both a title label and a secondary label beneath it.
Finally, the third option, page:AddBanner(name, title, label) works similarly to the previous option. In this case, the first value is the name, which will be read by screen readers and other accessibility technologies. Then, the second and third values are the title text and secondary label, respectively. You can use this option if you want to fine-tune the accessibility information separate from the text of the title.
[1] U.S. Department of Justice. Fact Sheet: New Rule on the Accessibility of Web Content and Mobile Apps Provided by State and Local Governments. April 2024. https://www.ada.gov/resources/2024-03-08-web-rule/
Engage
So far, you have learned about user interfaces and how to set up a basic app in Quorum Studio. Your task now is to become more comfortable in your design skills and start to add elements to your app. Your goals for this activity are to:
- Properly set up a Form app
- Add at least one button
- Add text
- Add a banner
Directions
With your first app, work on making an "About Me" page. You should include a banner, at least 1 button, and at least 3 labels. You can also feel free to explore the other elements and add more, if you want to. Your app is accessible by default, so no additional work is required unless you want to customize the experience, visually or otherwise.
On your app, your banner should say something such as "About Me!" and include a subtitle of your choice that describes you. Your labels might include a few sentences about yourself, your hobbies, your favorite foods, etc. Lastly, your button should have a label – it might include an invitation to learn more, or it could just say your favorite word.
You can use the following template to get you started:
use Libraries.Interface.Forms.Form
use Libraries.Interface.Forms.Page

Form form
Page page = form:GetMainPage()

form:Display()
When you finish your project and run it, your app might look something similar to this screenshot below:
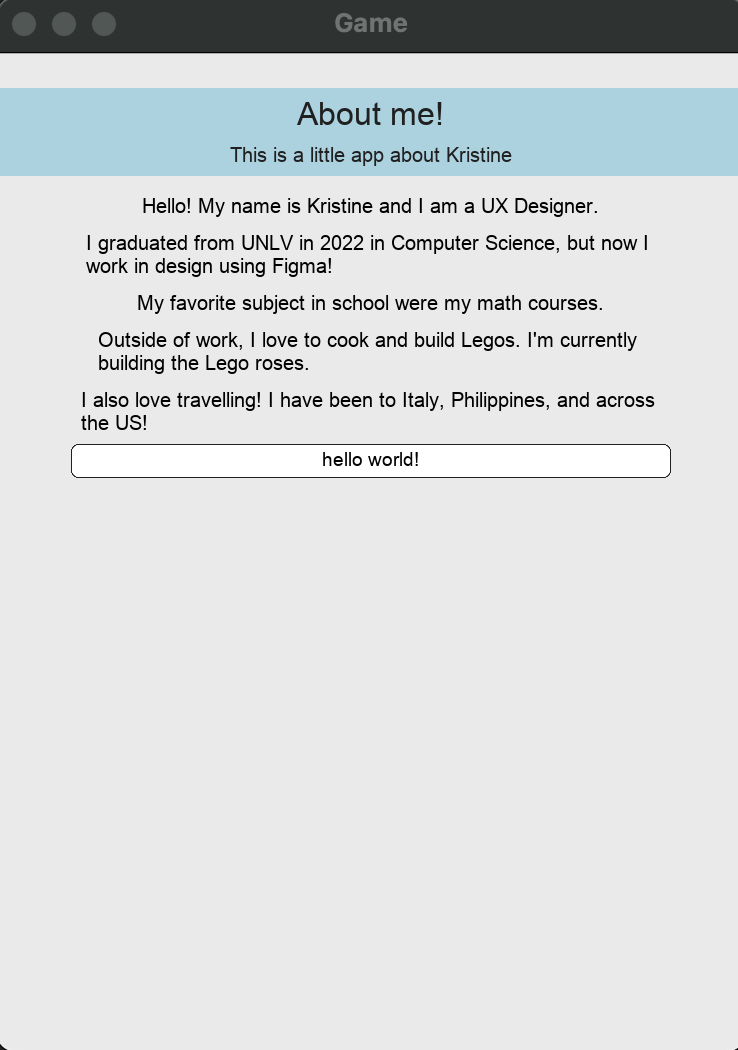
Note that this app is a static application. Although you are adding a button, it technically does not do anything yet. In a future lesson, you will learn how to add functionality to your apps.
Wrap up
So far, you have only scratched the surface on app design, but you can invent whatever you want. What kind of app do you think you, or people you know, might want invented?
Next Tutorial
In the next tutorial, we will discuss Actions and Classes, Part 1, which describes how to create actions.